
Bathroom Remodeling Cost Guide
We rounded up in detail all the costs you should take into consideration when remodeling your bathroom. Our bathroom remodeling cost guide is now available.
Why Should You Upgrade?
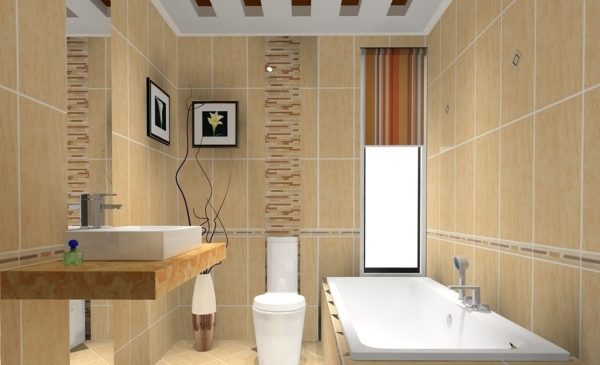
You start your day with a hot shower, and after work you take a cold one. At the end of a hectic day you just want a long, warm bath. An hour into sleep and you are woken up by a rumbling stomach – the wine and pizza combination did not go down well, so you lock yourself in the toilet for a long, long time. What if your bathroom happens to be a nightmare? You cannot groom in front of the cracked vanity mirror and stained countertop, or sit on the torn toilet seat cushion. The toilet flushing is annoyingly loud, the faucet leaks, while the shower produces erratic busts of water with the water not being uniformly warm. As for the bathtub – well it feels like an old canoe lined with an old sack. You realize that you have to remodel your bathroom. Here’s a rough-and-ready breakdown of your remodeling costs.
Cost by Budget Type
| TYPE | DESIGN/FEATURES | BUDGET |
|---|---|---|
| Low Budget (basic) | $3,250 - $6,800 | |
| Permit | $90-$1,200 | |
| Labor | DIY, Assistant | $1,000 |
| Flooring | Sheet vinyl | $300-$600 |
| Toilet | Basic | $200 |
| Shower | Simple | $200-$400 |
| Tub | Acrylic | $200 |
| Vanity and Sink | Granite | $200 |
| Faucets | Mid-grade Steel | $100 |
| Storage | 24” Cabinet | $500 |
| Increase in Resale Value (Percent) | 10% | |
| Medium Budget | $7,200-$15,500 | |
| Permit | $90-$1,200 | |
| Labor | Professionals | $2,000 |
| Flooring | Ceramic | $1,200-$3,600 |
| Toilet | Water-Efficient | $500 |
| Shower | Readymade Stall | $600-$1,200 |
| Tub | Water Jets, sit in design | $3,000 |
| Vanity and Sink | Integrated unit, solid surface | $1,200 |
| Faucets | Designer-made | $200 |
| Storage | 30”-48” Cabinet, Shelves | $800 |
| Increase in Resale Value (Percent) | 16% | |
| Big Budget (luxury) | $12800-$21500 | |
| Permit | $90-$1,200 | |
| Labor | Remodeling Contractor | $4,500 |
| Flooring | Natural Stone | $2,160-$4,800 |
| Toilet | Dual Flush, HET-Approved, Low-Noise | $1,200 |
| Shower | Drop-in Stall, State-of-the-art | $2,000 |
| Tub | Whirlpool, Sit-in design | $4,500 |
| Vanity and Sink | Dual sink, Stone or marble | $3,200 |
| Faucets | Quality designer-made | $400 |
| Storage | 48” – 60” Cabinet, Shelves, Closet | $1,100 |
| Increase in Resale Value (Percent) | 21% | |
According to HGTV, the actual budget varies with your choice of materials and fixtures. Knocked-down kits reduce your installation time, translating into a saving in labor costs. If you expect to sell the home, then it is better to have a professional remodeling with quality materials. A remodeled bathroom will boost the resale value of your house by between 10 and 20 percent.
Preparing to Remodel
Bathroom remodeling is a long-term project with significant costs implications, therefore plan for longevity and flexibility. As far as possible, preserve the basic infrastructure including the house structure, plumbing, and wiring, instead replace fixtures and finishing. Incorporate the needs of other users, such as seniors, guests, the disabled, and your partner and children. During the remodeling you will be disrupted from using the bathroom.

Obtain a building permit upon presenting your detailed plan. A permit is mandatory if you are altering a house’s structure, floor plan, and electrical and plumbing systems. The permit costs from $90 to $1200. Read the Building Code and the National Electrical Code thoroughly in order to understand the requirements on safety, structural integrity, and comfort, especially ensure that the GFCI, HVAC, ventilation, and natural lighting are properly installed.
Next, draw a floor plan for a remodeled bathroom. Assess each fixture and determine where to locate it in the new plan. Look for fixtures that fit in the available space, otherwise you might have to annex part of an adjacent room in order to expand the bathroom. It will cost you extra money to demolish and rebuild the wall, and redo the wiring, insulation, and plumbing.
You can either refinish or remodel. Refinishing helps to spruce up the usable fixtures while remodeling replaces the fixtures and finishing. A comprehensive refinishing costs less than $3000, while an average remodeling costs $15000.
A functional bathroom will have new facilities for bathing or showering, toileting, vanity, and storage, but if you have extra funds you can turn the bathroom into a luxurious facility. Bathroom remodeling is a complex project that must be done by either a remodeling contractor to plan, obtain permits, and remodel, or professionals like an electrician, plumber, and mason. Labor costs account for half the budget. Compare model prices from different stores and online shops. Look for a good but affordable remodeling contractor and do not shy from getting your hands dirty, contribute your labor. Recycle fixtures that may be in good condition and fit well in the new model, for example a sink or an antique tub. Discard worn out mechanical fixtures.
Refinishing
Project costs can escalate rapidly and so, if you are operating on a shoestring budget, you can do a DIY refinish instead of remodeling. You can still remodel in well-planned phases as funds become available, but ensure that subsequent phases do not interfere with completed ones. Assign the most essential and urgent tasks to the early phases. With a $1000 budget you can touch up the bathroom with a coat of paint and bathtub re-glazing, improve the décor with a new flower vase, ash tray, window curtain or screen, shower curtain, shaded lights, and candle jar. Accentuate the walls with bright paints or wall paper and framed pictures.
Place a large and stylishly framed mirror in front of the vanity or opposite the window. Install a glazed medicine cabinet, storage cabinet, and shelves under the sink and countertop. Refit beautifully-designed knobs and handles to the cabinet doors and drawers. Refit the towel rail and soap dispenser on the wall. Painting in bright colors is a low budget effort with dramatic effects on your bathroom and can add the illusion of a large space in an otherwise small bathroom. Paint the inside surfaces of cabinets and drawers in white or off-white color. Refinish the floor in boldly patterned vinyl, waterproof paint/stain. Or create a floating floor. Use stacked woven baskets or recycled wine barrels for décor and storage of linen and bathroom clutter. Invest in a stylish, water-efficient faucet. Place one or two potted plants or flowers on the window sill.
Remodeling
If your bathroom systems are old and worn out, then you have to remodel. The old tub has to go, unless it is it is an antique with a family sentimental value that you want to retain. Replace the leaking plumbing, cracked tub, sink and toilet, loose faucets, and so on. Perhaps your bathroom looks fine and you just want it to look even better, or you need an extra bathroom for the kids, guests, or the master bedroom. Maybe you are planning to sell the house soon and want to fetch a high price. Hanley Wood states that a bathroom remodeling is a major undertaking that on average costs $250 per square foot for a moderate bathroom. Upgrading to a standard 120-square foot bathroom would therefore cost $30,000. The project is too big and complex for a DIY, so you should engage a remodeling contractor.

Pick your new fixtures carefully in order to balance between quality and budget. Try to match quality and material for your new fixtures, for example a plain and downright cheap shower set would look odd with a state of the art bathtub. If you have a limited budget then you can confine the ceramic tiles to the surrounds of the bathtub, shower stall, vanity, and toilet. You ca also use alternative finishes like vinyl sheet, bead board wainscoting, and waterproof paint/stain. The small details in décor make a big difference in the overall appeal of the bathroom. The décor includes choice of paint, lighting, mirrors, knobs, exhaust fan, and designer faucets.
Labor
Although you should give the contractor or professional a free reign in their work, you should still maintain control over the budget, schedule, and design alterations. Contractors often inflate prices of materials and charge you for time spent on shopping, therefore you should either do or verify the shopping yourself. The electrician will install a new break-board, do rewiring and install switches, sockets, outlets, lighting, and décor lighting. The plumber will disconnect and reconnect the plumbing and drain systems, and install new ones. He will also fix any leaks and replace worn out systems. The carpenter will install all the cabinetry at the vanity, storage, and closet areas. A tile setter will do floor and wall finishing. You will hire an assistant to run errands and do general tasks like cleaning, painting, porting, and lifting materials. The professionals will work according to the Building Code and National Electrical Code. All workers will wear a safety helmet, clothing, boots, goggles, and hand gloves. The wage rates for the various professionals is tabulated below;
| PROFESSIONAL | HOURLY RATE | TOTAL HOURS | TOTAL WAGE |
|---|---|---|---|
| Plumber | $70 | 15 | $1,050 |
| Carpenter | $75 | 20 | $1.500 |
| Electrician | $70 | 15 | $1,050 |
| Tile Setter | $50 | 10 | $500 |
| Assistant (Handyman) | $30 | 20 | $600 |
Planning the Bathroom Space
The standard bathroom that we are focusing on has a floor area of 10’ x 12’ or 120 square feet. The approximate area for specific facilities will be as follows; 24 square feet for the bathtub, 20 square feet for the shower stall, 12 square feet for the toilet, 15 square feet for the vanity, 25 to 35 square feet for the cabinetry and closet, and the remaining space for the open floor. The bathroom has mechanical systems mainly for water delivery and heating including hot and cold water mixer, either a boiler/heater or an instant hot water shower head, shower massage jets, whirlpool/spa jets, dehumidifier, ventilation fan, and safety grab bars. The existing fixtures will be removed carefully to avoid breakage. You will either store or put them up for garage sale. The toilet, bathtub, sink, and the pedestaled sink will be removed from the floor, while towel rails, cabinets, and shower fixtures will be removed from the walls. The paint work and wall paper on the walls will be scrapped and sandpapered off. The demolition task will take a day for one handy person and cost you approximately $300.
Budgeting for a Bathroom Remodel
Make a budget for each section of the bathroom, as this will also help you to have a phased remodeling. Generally, in a completed remodeling, allocate about 35 to 45 percent of the budget to the bathtub and shower, 10 percent to the toilet, 15 percent each to the floor/wall finishing and the vanity, 5 to 10 percent to décor, and less than 10 percent to storage/closet.
You can cut corners around the budget and still end up with a fully functional yet attractive remodeled bathroom. For example, according to HGTV you can opt for a combo bathtub and shower. Remodeling Magazine estimates that the creature comforts of a bathroom would double or triple your budget compared to purely functional fixtures. A $7000 remodeling budget can give you exactly similar features to a $22000 budget. However, you should not penny-pinch the budget and sacrifice quality. Quality fixtures make it easier to sell your home and recoup 95 percent of your cost compared to 60 percent for standard fixtures. Moreover, a full-bath has a 20 percent increase in property value compared to 11 percent increase by a half-bath, therefore investing in quality is not flushing money down the drain.
It is also worthwhile to invest extra money on energy-efficient systems. An instant hot shower uses less electricity than a boiler/heater system. A water-efficient toilet uses half the amount of water used by a traditional flushing system. For aesthetic appeal, invest in a recessed medicine cabinet, a large bathtub, a well-designed toilet, a quality vanity, especially countertop finish and faucets. A “his and hers” double-sink is ideal for couples, extra storage shelves, and a linen closet. Such an investment will add a $6000 dent on your wallet. If you enlarge the window or build a second one to the building code standard of 30 square feet lighting area, then you will spend a further $500 to $2000. The job will involve a mason and a carpenter working for five or so hours.
Dismantling Fixtures
You have to remove fixtures that will not be reused, and either sell or reuse them elsewhere. The cost of removing the various installations will be as follows;
| FIXTURES | PROFESSIONALS | DURATION | COST |
|---|---|---|---|
| Flooring | Tile setter/Assistant | 2 hours | $120 - $200 |
| Shower | Plumber | 1 hour | $100 |
| Bathtub | Plumber/Assistant | 1 hour | $150 |
| Toilet | Plumber/Assistant | 1 hour | $100 |
| Vanity | Carpenter | 2 hours | $200 |
| Storage | Carpenter | 1 hour | $75 |
| Wiring | Electrician | 1 hour | $75 |
Flooring
The floor gives you the first impression of a bathroom. It is important the floor is waterproofed, easy to dry, and not slippery. When flooring, you need to first remove the existing finishing, which would cost about $200. The cost of finishing the floor depends largely on the type of material and the amount of labor required to install it, as indicated in the quick breakdown below;
| MATERIAL | COST PER SQ. | COST 120 SQ. | ||
|---|---|---|---|---|
| Low | High | Low | High | |
| Linoleum | 5 | 7 | 600 | 840 |
| Marble | 16 | 18 | 1920 | 2160 |
| Ceramic | 1 | 1.6 | 120 | 192 |
| Porcelain | 6 | 9 | 720 | 1080 |
| Wood | 10 | 15 | 1200 | 1800 |
Different materials are used to cover a medium-sized (120 square feet) bathroom floor. Linoleum is commonly used because it is a waterproof, non-staining material that costs $5 to $7 per square foot. It however needs time to set and dry. Porcelain is a hard wearing, gloss finished, germ and mold resistant material that has diverse designs and colors, and costs $6 to $9 per square foot. It requires a special bonding compound. Ceramic is a cheaper version of porcelain, and it costs between $1 and $1.6 per square foot. Marble is a luxurious way to finish the floor and it is naturally beautiful when polished. It costs $16 to $18 per square foot but requires periodic repairs because it cracks easily. Natural wood tile is also an expensive but well-accented option that costs $12 to $20 depending on the type of wood.
Wood has to be periodically waterproofed through waxing. Wood laminate, which is a cheaper, laminated and waterproofed block of wood, can substituted the natural wood tile. Other options are stone, slate, terrazzo, vinyl sheets, and stained concrete. A bathroom tile has to be small, for example 12” x 12”, and therefore uses more caulk and grout. Choose a bright color scheme for the floor which should complement the bathtub and vanity, makes it easy to spot dirt, and makes a small room appear larger. According to HGTV, the budget for flooring the 120-square foot floor is between $120 and $2160 for tiles, $240 for caulk and grout, and $200 to $750 for labor.
Installing the Bathtub and Shower
Shower versus Tub
Your choice between a shower and a bathtub depends on the space, budget, taste, and circumstances. Determine if your bathroom has space for both or not, and whether you can extend the floor area to accommodate them. Consider the intended users of the facility. It is safer and easier for the young children, seniors, and the disabled to use a bathtub, whereas adults and older children prefer a shower. The tub is costlier and more luxurious than a shower, for example a standard shower system costs $300 compared to a bathtub which costs $600. A shower can have an instant water heater at the shower head, which can save on energy use. It is easier to install a shower than a bathtub. Home buyers are attracted to a state-of-the-art shower more than a high-end tub. Using an intelligent shower system with pressure jets for massage and temperature control. A low-flow shower head helps to conserve water without sacrificing functionality. The cost of installing the shower ranges between $1200 and $2000 compared to installing a bathtub at $800 to $1400.
Installing the Bathtub
The bathtub is usually located farthest from the door or behind the shower cubicle. However it is the signature statement of your taste and style. In fact the bathroom theme is designed around the bathtub. Home Advisor advises that you install the bathtub before other installations because it is bulky and heavy and would be obstructed by other installations. You will need help to carry it into the bathroom. Although a bathtub is hard-wearing, over time it develops unsightly stains, dents, and leaks, loses its gleam, and feels rough to sit in. In short, it becomes a misery to use. You can either refinish the old tub or replace it. Refinishing gives the old tab cosmetic touchups by re-glazing. However, the good-as-new look may be covering up underlying defects like cracks, dents, and stains. Refinishing the tub will involve scrapping off the old finish, filling and smoothing the dents and cracks, applying glazing material, and allowing the tub to dry for a couple of days. Refinishing a bathtub will cost between $250 and $500, and an antique will cost between $600 and $1200 for an antique bathtub.
The bathtub is one of the important remodeling flagships. A decent bathtub retails at $400 but the overall cost of installing it can easily surpass $3000 as illustrated below;
| ELEMENT | AVERAGE | LOW | HIGH |
|---|---|---|---|
| Bathtub | $ 400 | $ 200 | $ 700 |
| Demolition/Removal | $ 120 | $ 50 | $ 300 |
| External Plumbing | $ 300 | $ 120 | $ 750 |
| Tub Installation and Finishing | $ 2,900 | $ 500 | $ 5,500 |
| TOTAL | $ 3,620 | $ 870 | $ 5,250 |
| Compared to Refurbishing | $ 460 | $ 250 | $ 1,000 |
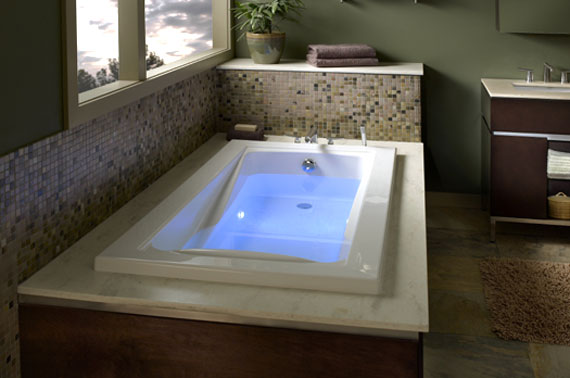
When buying, choose a strong and durable tub with good finishing. It is better to sacrifice features for quality. A good bathtub is comfortable to get into and sit in while bathing. An old type bathtub is made of cast iron, is heavy, and freestanding, but it will easily outlive your house. A standard bathtub is made of strong yet lightweight acrylic or fiberglass. When upgrading, look for features like water-efficiency, energy efficiency by a built-in heating system, and ergonomic design. An advanced tub will have an intelligent/electronic control panel to monitor and control water temperature, pressure, and acidity. Whirlpool will produce a soft bubble therapeutic effect while steam jets will do body massage. The panel should also control the automatic dispensers for soap, shampoo, shower gel, and aroma-therapeutic oil. Ergonomically, the tub should be designed as a sit-in tub for two people, and user-friendly for children and the elderly. It should have a drink holder, and its faucets should portray your style and elegance.
A low-end acrylic bathtub costs $400, a high-end model will cost $2500, and a standard model will cost between $700 and 1400. A custom-made, freestanding bathtub costs from $3000. The total cost of installation of a new tub is on average $2900. The cost of dismantling the old bathtub is $150, reconnecting the system is $300, and completing the remodeling in the bathtub area is $2900 over and above the cost of the tub and accessories.
Home Advisor advises against DIY since modern bathtubs are advanced systems and you will end up doing a shoddy and dangerous job. If you are doing a first time installation then you need to do the plumbing and wiring first. Connect the hot- and cold- water inlet, and the drain pipe. If you are replacing the old bathtub then you will first shut down water supply at the main valve, dismantle the surround of the tub, disconnect the inlets, faucets, and drain pipes from the tub. Unscrew the tub and pry it loose from base, and remove it from the area. Install the new bathtub by reversing the process you did for dismantling and reinforcing joints with plumber’s putty/caulk. It should be slightly tilted towards the drain pot. Do the necessary wiring for the control panel, instant water heater, light fixtures, and GFCI. Finally, test and fix any leaks with plumber’s putty in the faucets, valves, joints and caps, and jets. Test the electrical connections as well.
Installing the Shower
You can install a basic shower with a hot and cold water faucet, or a moderate model with an instant hot water showerhead, or go for a modern model. A state-of-the-art shower, designed for comfort and affordable luxury, has an intelligent console for monitoring and controlling the shower environment. It can be set to operate at a preset time, temperature, pressure, and massage jets. If you have space or financial constraints, then you can install compromise shower-tub combo system. A basic shower unit costs from $350 to $800, a standard unit will cost from $700 to $1500, and a high tech shower averages $1800 to $2500. For an instant hot showerhead you will add $250 to $400. A state-of-the-art shower-tub combo will cost you at least $3000.
Glazed and frosted shower door and wall panel are elegant and they allow light to pass through. Glass doors come in two types; swinging and sliding.
The swinging doors are convenient to operate while the sliding doors are ideal for tight space. The glass shower frame is made of aluminum and the base is sealed with a caulk-grout mixture. The glass door and panels cost $600 to $1100, while installation will cost $250 for a three-hour job. A backer board is used to support the shower cubicle and protects the wall from splashed water. Start by installing a green board that acts as a moisture barrier and apply Thinset Mortar to bind the backer board to the green board, before screwing it to the wall. The shower cubicle is finished with acrylic or fiberglass stall, or tiles. The walls will be finished with one of frosted glass, glass blocks, or fiberglass. The shower area will need soft and white light in a waterproofed globe. A ceiling-mounted fan will be installed to dehumidify the cubicle and maintain fresh air circulation. Additionally, for complete hygiene you will install a bidet. These embellishments will cost an additional $2800.
Installing the Toilet
The toilet is a vital part of the bathroom, and it is the biggest consumer of water in the house. The old model toilets use 3gpf (gallons per flush). With an average use of five to ten times a day, one person flushes 15 to 30 gallons and a family of four flushes 60 to 120 gallons of water daily. New toilet designs are able to flush as little as 1.2gpf, and flushes just once in each flush.
Shop for a water-efficient toilet that uses less than 1.6gpf. A pressure-assisted system attains 1.3gpf, while a dual-flush system averages at 1.2gpf.
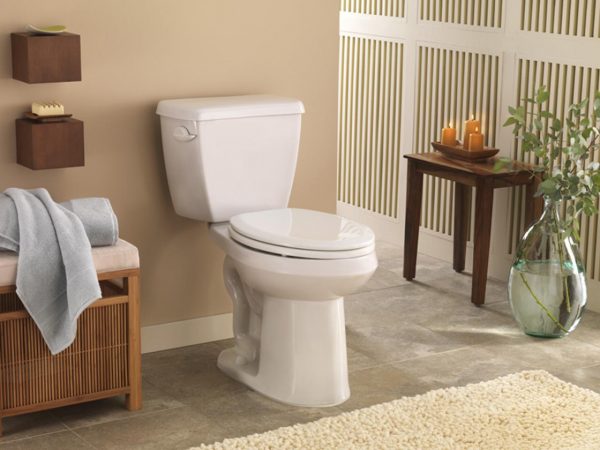
However, pressure-assisted flushing is noisy. Look for a toilet system that has low-noise design, is easy to clean and operate the flush mechanism in one flush. A wall-mounted toilet is easier to clean while a high mounted tank gives a stronger gravity-assisted flush. Some utility companies offer rebates for EPA-labeled High Efficiency Toilets (HET). The modern design has a larger flush valve for quick flow, straight trap ways for smooth flow, a strong jet for better cleaning and well-glazed bowl for easy cleaning. An ergonomic design should be comfortable to sit on, have a small-sized unit, not cause a splash when being used, and have an easy handle or button for flushing. Finally, you ca never go wrong with a plain white toilet, but if you choose a colored one then let it blend in well with the rest of the bathroom. A colorful toilet shows signs of color fading after some time. Fancy mechanisms and add-ons enhance the enjoyment of the toilet, but they soon fail and become a liability that costs $100 to $200 to repair every year. A cracked toilet seat pinches your leg, a used cushioned seat makes a funny swish sound when you sit on it, and a button flush wears out fast. According to Handyman, showrooms and online shops give you a wide choice of HET with 1.28gpf or less.
Manufacturers like American Standards, Flowise, Home Depot, Gerber, and Kohler make quality toilets.
Toilets cost from $150 for basic models to $1200 for ergonomic, low-noise, water-efficient, and self-cleaning models. Handyman advises that you should not pinch the penny when budgeting for a toilet unit, you get what you pay for. A cheap toilet is likely to be a poorly designed, with roughly glazed, poorly, and wasteful flushing. You can buy a gravity-assisted model for $300 to $500 or a pressure-assisted toilet such as Gerber Ultra Flush, for $400 to $600. The dual-flush tank costs $150 to $300 while an upgrade to pressure-assisted flushing costs $50 to $100.
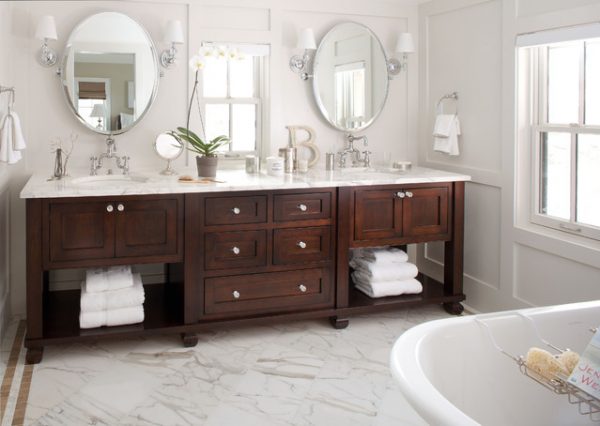
Installing the Vanity
The vanity includes the vanity shell, a countertop, faucet, a sink, a toothbrush holder, wall-mounted medicine cabinet, and under-mounted cabinet. Your current vanity has become dull to look at, is too small or no longer fits in the new bathroom design, so it is time to upgrade. Vanities vary in size from 2 feet to 5 feet to suit you space. The price depends on the material used to build it. The cost of labor depends on the size of vanity. The average home spends about $2000 on a four-foot vanity.
| SIZE | ECONOMY PRICE | MEDIUM COST | HIGH COST | LABOR COST |
|---|---|---|---|---|
| 24' (2ft) | $450-$600 | $700-$1000 | $1200-$1800 | $250 |
| 30' (2.5ft) | $500-$650 | $900-$1500 | $1500-$2500 | $260 |
| 36' (3ft) | $500-$700 | $1200-$2000 | $2500-$3500 | $310 |
| 48' (4ft) | $550-$750 | $1500-$2500 | $3000-$4000 | $320 |
| 60' (5ft) | $600-$800 | $2000-$3000 | $3500-$5000 | $410 |
| Medicine | $500-$700 | $750-$900 | $1000-$1500 | $250 |
Installation of the vanity involves carpentry, plumbing, and wiring. Before you start installation, shut off the water supply at the main valve, then disconnect the water inlet and drain pipes from under the sink. Inspect the plumbing for leak and replace any leaking and aged pipes, joints, and the shutoff valve, Dismantle the medicine cabinet, faucet and sink from the countertop Remove the under-mount doors and drawers. HGTV advises that you start vanity installation by finishing the wall first. Scrape off the old paint from, and repaint the wall.
Next measure out the points for mounting the new vanity. It is easier and faster to install a ready-made vanity or a single-unit cabinet. Using a screwdriver, install the overhead cabinets and finish them with a tile baseboard and filler strip. Now install the countertop chosen from quality models and refreshing colors, for example the $200-granite countertop from Kohler, American Standard, or Porcher. You can opt for the more elegant slate, stone, marble, glass, onyx, or travertine countertop that costs $750 and more. Join the sink to the countertop using caulk and a bonding compound. Reconnect the flexi-drain pipes and a stylish faucet with a glass or acrylic handle. Seal around the pipes joints with a sealant and test the plumbing for any leaks. Add Apply colored grout around the cabinet edges to hold together the vanity pieces, and around the pipe joints to seal them from water leaks.
You can add a backsplash on the wall behind the faucet to protect the wall against water splashes. Install tiles in an interlocking manner using caulk and a bonding compound. A backsplash costs less than $50 to install. Finish the rest of the vanity surround with ceramic or porcelain tiles. An electrician will redo the wiring and install vanity lights, switches and shaving socket in the vanity area. According to Do It Yourself, demolition and installation of the vanity takes four to eight hours and $300 to $600 in labor charges. A new vanity costs a total of $1000 to $2000.
Installing a Closet and Storage
Build a functional closet with ventilated doors or louvres for linen and extra hygiene products (soap, tissue paper and so forth). Make a few shelves in the closet. A closet will cost $200 in materials and $150 in labor to install and add value to the bathroom. Install extra cabinets if there is free space along the wall.
Customizing to a Master Bathroom
For a couple’s bathroom, you need a dual vanity and sink, to give them a sense of privacy. You can also have a built-in closet at a cost of between $300 and $800. A dual vanity will cost an extra $250 to $600 to install. Note that a master-bath-suite is trendy because it combines a bathroom, walk-in closet, and dressing area, into one large space. Since the master bathroom is private, you can give it a personal touch. Use light colors to finish the closet.
Energy Efficiency
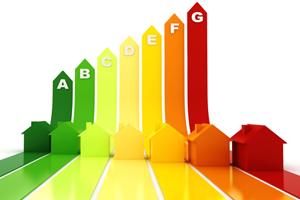
The bathroom uses a lot of electricity to heat water and light the room. It is also the main consumer of water in the house. According to Do It Yourself and Family Handyman, you can reduce your electricity and water consumption significantly by adopting low-flow showerheads and faucets, steam jet showers, HET and dual-flush toilets, and low-energy lights. It costs less than $5 to repair a minor leak. An extra $150 will do a proper insulation of the hot water system. Install the boiler close to the bathroom in order to reduce heat loss in the pipes. Switch to a smaller boiler if you have a small household. You can also install a solar water heating system that costs $1500 which saves you $100 in monthly electricity bills.
Install a shower-efficient system that has a low-flow showerhead and faucet which allow just 2.2gpm compared to the traditional 8gpm shower. Install aerated water jets and an instant hot shower system. A low-flow showerhead and faucet, which cost $200, give less than 2.2gpm. An aerated steam jet system that costs between $200 and $400 creates a powerful jet with less water. An instant hot shower system saves up to 50 percent less electricity per shower than the boiler system. The instant shower heater costs $200.
Install a HET system in the toilet, including a low-noise pressure-assisted toilet which uses just 1.6gpf compared to the traditional toilet that uses 3gpf; a dual flush system which reduces consumption by another 25 percent. Transforming the flush unit to a dual-flush costs between $100 and $300. The following measures will not only improve energy-efficiency, but will cost less to implement than conventional systems. Use natural lighting whenever possible, fewer bulbs, and LED lighting. A large bathroom window increases natural lighting, improves ventilation, and reduces use of the fan. Use moisture- resistant finishing to control molding.
Installing the Towel Rail, Hooks, Grab Handle/Bar
A towel rail for hanging your towel and bathrobe hooks for hanging your bathrobes or night clothes can be installed near the bathtub or shower, behind the bathroom door, and at the vanity area. Grab bars for the frail and sick are installed in the bathtub and shower areas. Family Handyman explains that the installation is a simple DIY task in which you will mark the holes for the screws using the fixtures to guide you, drill the holes using a 1/8 inch drill, and fasten the fixtures. A towel rail is positioned four feet while the hooks are positioned at five feet above the floor. The fixtures cost less than $100.
Décor
To improve ambience in the bathroom, paint the walls with bright colors and use a screen to filter light from the window. Install canister lights in the ceiling and soft, shaded, lights in the vanity area. Use glossy and bold patterned flooring and walling. Use color-coded lights controlled from the intelligent control panel to indicate water temperature. Replace drab-looking faucets, grab handles, cabinet handles, and door knobs with stylish but affordable designs. A decorated shower screen or curtain adds privacy and beauty to the shower. The cost of light fixtures will be between $100 and $300, while painting will cost $100. The miscellaneous fixtures will cost about $200 to $500.
Bathroom Remodel on a Budget Ideas & Tips
Nothing ups the resale value of your home quite like an updated kitchen and bathroom. For new home owners, young families, or those who just aren’t in the financial situation for a full remodel quite yet, those professional estimates can be scary.
When it comes to kitchens, it is rather difficult to pinch pennies. Just replacing appliances can cost thousands! Bathrooms, however, offer unique opportunities to update in a more modest way. All it takes is a little creativity!
Whether you are looking to put your house on the market, create a relaxing bath time escape from the stress of work and family in the master sweet, or simply make guests feel more welcome in that first-floor powder room, it can be done! You won’t break your back doing it, and, the best part is it doesn’t have to cost an arm and a leg either!
Check out these bathroom remodel budget ideas and start loving your space just a little more!
Let’s Start with Lighting
Nothing screams ancient bath styling like out of date lighting. Trust us, with a little study, you can do this yourself, saving hundreds, maybe even thousands on new lighting.
What’s more, is in the modern age, there are plenty of sleek, modern lighting options online that are super affordable. If you have existing overhead lighting, you’re golden. Find what you like, order it, and in a few hours, you’ll be loving your new lighting.
Some tips for light change outs:
Never work with electricity alone! This can be a hard lesson to learn if you’re a homeowner full of bravado, but while the chances of getting zapped are slim, you don’t want to risk it without a work partner to dust you off afterwards. More importantly, it is much easier to flip the breaker on and off and test your light when you have someone to run to the basement or garage panel for you. It is also much easier to work on a ladder over your head with someone there to hand you tools. Which leads me to my next point…
Invest in the proper tools. Go and get yourself a meter, if for no other reason than to double check if a wire is hot. It is also important to have a meter if you are working in an old house. When I first endeavored to swap out my own bathroom lighting, it took a lot of guess and check to figure out if I had wired things properly. This is because all the existing wiring had lost its color after years of wear and tear. The lighting kits you buy will come with instruction that is almost entirely contingent on the casing color of the wire, but if you have a meter you can circumnavigate this step when your wires all seem to be black. Find out which was is hot, which one is ground, mark them, then cut your power.
Invest in the proper tools pt. 2. You will also need to have a good pair of wire cutters, and an actual set of long needle nose pliers. Working in the small cut outs over your head is hard enough. Then you are forced to reckon with the plate that fits over the hole where the wires run through and where the fixture ultimately attaches. Some spaces are just too small for fingers. This is one of them. Some good, long hand tools will make this process exponentially easier.
The caveat! It is certainly reasonable to save money by doing your own lighting switch, and definitely more cost effective to order the fixture yourself through an online wholesaler and not through an electrical contractor. However, it is probably not in your best interest to try and vent the space yourself. If you have existing venting, awesome. Look for fixtures with built in venting. If not, you have to decide how important it is to you to have the vent. If you are trying to stay in this house long term, it will probably be worth your while to hire someone just to run the vent. If you are just looking to list the home and all you need is an aesthetic improvement to up the value, then you can definitely do without the fan.
Fresh Paint
If you feel like you are desperate for an update in the bathroom, often times you could just be a victim of a bad color scheme. Each stylistic era, whether it is with regards to fashion, home design, car models, or any other trending consumer industries, leave the next era wondering what the heck everyone was thinking! This is especially the case with color.
When it comes to home design, it is our humble opinion that you want to be as timeless as possible. That means neutral, light colors, especially in the bathroom where lighting is key. Compliment your new lighting by covering that dark green and mustard yellow combo with a fresh coat of light grey, greige, tan, white, or whatever you prefer.
Floors Too
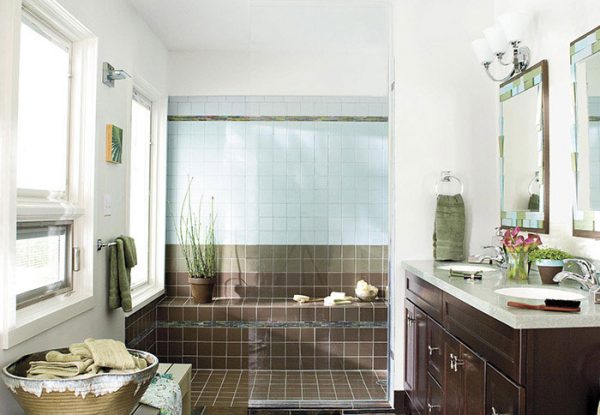
This is true of flooring as well. Elaborate tile patterns are a thing of the past. Those small, mosaic designs need to go. Pick a simple pattern with the same color principles in mind as you did your walls. When it comes to color in bathrooms, accents are your friend. You’ll liven up the space later, bringing in your personality with hand towels, shower curtains, and wall hangings. What you don’t want is for a large, textured surface area like your floors or walls to dominate the room with an overbearing color.
Once you have decided on a nice neutral tile and you’re trying to decide whether or not to hire someone and try your hand at laying the floor yourself, give yourself a little credit. Tile work, and flooring in general, scares a lot of homeowners away from diving into projects on the weekends. But the fact of the matter is there are a ton of high quality, affordable products on the market that make this process super user friendly.
In fact, the demo will be the hardest part. Head down to your local rental center and pick up a hand-held jack hammer. For $100 a day, it will totally be worth it and save you the worry of breaking off a little more than you bargained for with a sledge hammer or full-size jack hammer. After the first foot or so comes up, the rest can probably be taken up by hand or with some very casual passes of the hammer tool. Make sure to clean up well and keep that sub floor dry. Another beautiful thing about replacing tile with more tile is everything you need underneath will already be there. This is an added benefit of using the hand jack: you will be able to gauge depth better and won’t damage that sub floor.
If you are uncomfortable with thin set concrete mixing or grout work, just spend some time searching for a product that makes the job a little easier. There are plenty of package deals on the market that walk users through the mixing process in a really simple way. The other beauty of these types of products is everything you need for the mix is included. The alternative forces users to think about grout color and texture as well and to buy the products that achieve those preferences separately (i.e. milk, sand, etc.).
Always use spacers with tile. We know what it is to eye ball grout lines and end up with one or two wider or smaller gaps that will haunt you for the rest of your life, or the rest of this particular floors life, at least.
Once you are ready to grout, prepare yourself for tedium. This is a solitary task, but it’s not difficult, just time consuming and messy. Pick your color and texture and work cleanly. Rather than grouting with a small trowel, use a mason’s sponge. The pros always sponge in grout lines and they also keep a second clean sponge handy in a bucket of warm water. This is because the tendency is to sponge the grout perpendicular to the grout line, which is the correct way to ensure that space is filled and flush to the tile face. However, this technique will also certainly drag group across the face of tile. Think of it as purposeful coloring outside of the lines. Just be ready to sponge that up right away. This way, you are saving yourself some clean up at the project’s end.
Here is a complete list of the things you will need to make this job go off flawlessly:
- Hand held jack hammer
- Clean up tools (shop vacuum, shop broom, etc.)
- Large trowel (for the actual application of the thin set)
- Thin set/mortar mix (remember: go for a bundle product with all the colors, textures, and mixing directions in one place)
- Flattening trowel (for the smoothening of the thin set)
- Sponges
- A small paint bucket
- Dry towel
- Grout (same principle as the mortar mix here)
Other Flooring Ideas
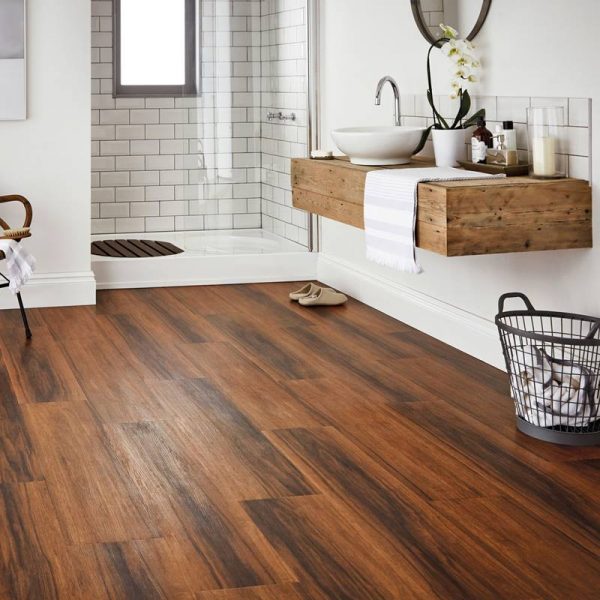
Tile is not the be all end all of bathroom flooring. There are other surfaces that are MUCH easier than laying fresh tile and serve the same purpose. While you won’t exactly want a hardwood surface, what with all the potential for water damage, it is perfectly reasonable to use a wood style laminate, or any other laminate flooring in your bathroom. There are even laminate designs that mimic tile and laminate faux grouts are a thing of beauty.
The catch to using a laminate is you will need a sub flooring that thickens the surface and is moisture absorbent. These products exist but are surprisingly more expensive than you might think. You can buy a roll of moisture absorbent subfloor in a roll that gets you close to 50 square feet for up to $50. Think of this product as a plastic carpet mat filled with tine little beads. The beads do the job of protecting from mold or other water damage. You will need to cut the roll to fit you space. Don’t skimp on the corners, or you will end up with a board that creaks or has a ton of give as you are walking through.
When laying the laminate itself, most kits are tongue and groove and will flatten out as you build out the surface area of connecting pieces. You may need to cut a few pieces around toilets and corners. we would suggest laying out your patter so that all your cuts are on the short side of each laminate piece. Otherwise you will have to rip pieces the long way, which creates a ton more opportunity for mistake and waste of material. Once it is laid out, there are products out there that allow you to grout the lines in your flooring with a kind of caulk adhesive. These come in all types of colors and are even packaged with laminate styles in some cases. In other words, there will be a grout product that corresponds with a laminate style of the same product line. These are sold as tubes, so you can just squeeze the material across the connecting gap and smooth it out with a finger or sponge.
Finally, once your floor is laid, you will want to caulk against tub and toilet. Spend some money here are a good plumbers caulk that matches your color scheme. Do your best to smooth it out and create a seamless look as much as possible. This will be vital to the health of your floor and subfloor as it will stop water from getting under that new flooring.
Design
Now that the essentials are taken care of, you get to bring in those wonderful accent pieces to liven of the bathroom experience in a way that fully reflects your personality. Go crazy here! You may be discouraged if you are in the camp of trying to sell your home, thinking maybe buyers won’t like your style.
However, any real estate agent will quickly reassure potential buyers that the bones of the room are sound and neutral. Plus, you still have to live there for as long as it is listed, so why not enjoy the time you have.
With your focus on repairing these three main components, the lighting, the flooring, and the wall colors and accents, you can turn even the most ancient looking bathroom spaces into a modern oasis of bath time relaxation. This revamp will not only change your bathroom experience, it will up the resale value of your home and be a source of inspiration for anyone you entertain, even those just there to make a pit stop.
Sources
Remodelling Magazine
HGTV
Home Advisor
Do It Yourself
Family Handyman