
How To Build A Fire Pit: Cost Of Materials And Tips for DIYers
We put together a practical guide on how to build a fire pit and keep your yard as well as your family and friends safe from accidents.
Fire pits are made to contain fire in a specific place. When done right, they are some of the prettiest decorative pieces in a yard. Usually, you can find fire pits in the backyard of a home or the shared yard of an apartment. They have become so popular that stores offer their own premade models to set in your yard. The expense of these premade fire pits vary and are mostly fair. But what if you could lower the price even further while dictating the design of the fire pit? A DIY fire pit has been an option for a long time, and it’s a project that takes surprisingly little effort.
The Pros And Cons Of Building A Fire Pit
Other DIY projects will suffer harsh penalties when you don’t do a lot of prepping beforehand. Fire pits are the exception, where it is easy to start and stop in the middle of the project without any issues. That is one of the many pros of building your own fire pit. Even with all of the upside, there are still some things that need to be singled out on the con side.
Pros
An inexpensive way to decorate your yard with as little space as possible. Can be the finishing ‘touch’ on an incomplete design idea. Modern ideas have introduced the fire pit inside of a table, giving it a double duty for usefulness.
Since it is your build, it can be as small or large as you want. This gives users the opportunity to cover up an ugly patch of grass in the yard with a fire pit. With a little bit of work put into it, you can create a fire pit that can be closed when it no longer has a flame.
Wood is cheap, so if you plan on using it to keep the fire going then you’re in luck. Even going the natural gas route has its advantages in price. No matter the material, they are all cheap to burn and last a long time.
Once you have a fire pit burning, maintenance is low. There is little to no cleanup needed for a properly made fire pit. Users that opt for the natural gas route will gain the benefit of less smoke while burning. This is the cleanest method for fire pits when you don’t want to deal with the aftermath after the fire goes out. Wood fire pits have ash and embers, but nothing that light maintenance won’t take care of.
Adding a glass or other designs enhances the look and flow of the fire pit. The increase in ambiance is worth what little effort you have to put into transforming the pit. Users that are sensitive to the smoke will prefer this method since it minimizes the smoke that escapes without taking away the look and feel of a fire pit.
Cons
DIY fire pits are not portable. The instructions are given for this guide (and every other guide) gives directions for a fire pit that is stationary. You lose the portability of a branded fire pit that can be moved easily from point a to b.
You’ll save money, but not the usual huge chunk like with other DIY projects. Making your own fire pit can sometimes be more expensive than purchasing one outright. For simple designs, it is indeed lower than purchasing from the store. But there is too much variety to say that with 100% accuracy. So in all fairness to companies that make fire pits, a DIY version is equal in price or more.
Starting a fire is a piece of cake with gas fire pits. Wood is a little different unless you decide to buy the store-branded products. Buyers that settle for natural wood will have to get the fire started the old-fashioned way. On a normal day, it is no more difficult than tying your shoes. In windy weather things get difficult, forcing the user to have patience when starting the fire. Having a backup plan for starting fires is a good idea to avoid issues with natural wood.
Natural gas is easier to start but requires a gas line being placed. Your setup will decide whether there is value to doing this. For smaller fire pits it would be easier to stay away from natural gas since it isn’t worth the effort for the small area. Medium to large areas is where you will see the best return for your money when using natural gas.
Some people are highly sensitive to the amount of smoke given off by wood fire pits. Allergies may flare up when this happens, so unless you have countermeasures planned (glass top/natural gas) then it is going to be a problem.
Materials Needed
This is a no-frills DIY project with a base that is made up of entirely one material. The only time-consuming thing about the project is deciding on a design. This quick and easy fire pit can be finished by any skill level, even if you’ve never held a tool before.
Paver – Consider this the most important material to get started. Without it, you are holding a bag of dirt. Pavers come in many different sizes and types, so choose carefully. When you know the design of the fire pit that is being built, then collect the correct pavers that will let you mimic that design.
Remember that you’ll also need pavers for the floor, so square works best. That’s not mandatory as there are many designs using triangle pavers for their floor.
Paver Sand – Use this to cover any gaps or cracks in the floor from uneven pavers. You don’t need a lot, just enough so that you can sweep it into the open crevices. Paver sand is cheap and can be found in the same area where pavers are sold. Some places even offer starter sets that include the pavers+sand all in one package with a nice discount.
The Job
Find a suitable spot to place the fire pit in the yard, taking great care to ensure that you measure for the actual size. After this quick check, it’s only a matter of placing the pavers in the design that you desire the most. A square and circle are the most common examples, but you aren’t forced to choose between the two. Options are endless for DIY fire pits. You can even have a fire pit that acts as a walkway into the backyard. Pavers are also used for the floor, so there will be imperfections here and there. Pour the paver sand on the floor of your finished project and sweep it with a broom. This will cover up the gaps in the floor and on the lower side. In a worst-case scenario, you can use a hammer to chip off unwanted parts of the pavers. Doing this correctly will make sure that every piece fits regardless of shape. If you build the pit high enough, then natural gas can be used in place of wood. But remember, natural gas is valuable only when it’s not used on small fire pits.
Costs Associated With Building A Fire Pit
Once again, this is an amazing DIY project. Anyone can do it, and the cost is low. But the actual savings are slim to none compared to a branded fire pit. So it is all about convenience and freedom of design when building a fire pit. Even so, there is still no other project like it.
Pavers won’t cost you a lot of money since you pay per item. Get as many as you like without breaking the bank. You’ll be able to purchase them for different prices, as most companies charge by type. That means a triangle paver will be valued differently than a square one. – $0.70 each-$1.20 each
To cover up the imperfections of your build, paver sand can save the day. It is like icing on the cake, following the same low price guidelines as pavers – $2.00-$6.00
The only other materials you’ll need is measuring tape and an optional hammer. Both are so common in a household that it wasn’t worth including them in the total cost. So the base for making a homemade fire pit includes paver and paver sand, with everything else optional. Adding glass and other features will bring the price up, but for the base, you’re looking at less than three hours to put together.
Tips
Tips are worthwhile for all projects, even the simplistic ones like a fire pit. Safety isn’t a big concern if everything is done correctly. When in doubt, check out videos that outline the process of placing pavers and covering the gaps with paver sand.
Keep fire pits at least 10 feet away from flammable substances. This is for the safety of yourself and anyone near the flames. It is also recommended to keep the fire pit away from any low hanging materials that could get caught in the flames. Flames rise and lower on their own, so the position is important when making your own pit. Since this isn’t a portable project, building it in the wrong spot will just make it a big annoyance later on.
Don’t forget to put paver on the inside of your fire pit. Without a non-flammable surface, you risk spreading the controlled fire. Placing the pit directly on the grass or leaving big gaps that expose the grass endangers you and everyone around the pit. That is why getting the sizes linked and covering them with paver sand is such a vital step. As a side note, always choose a steady surface to place your fire pit so that it can withstand wind, human error, and even curious animals.
If your fire pit isn’t properly containing the flames, then there is an error somewhere in the build. You don’t need to tear down the entire build to correct this problem. Spotting the location of the structural issue will let you fix the problem area. Successfully reinforcing the bad area with dirt and rocks should get the job done, and it only takes a few minutes.
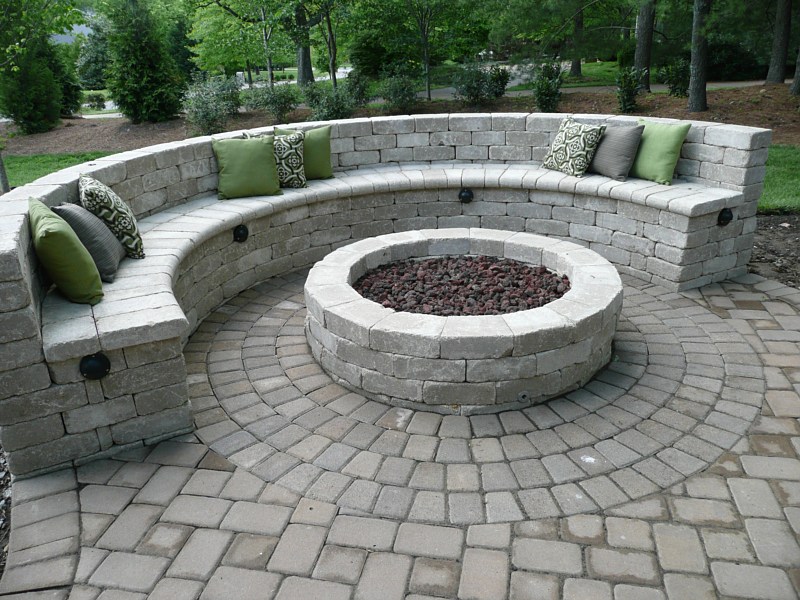
Adding a wraparound bench near the fire pit is a fun way to get everyone together. You can also build this yourself, or even construct a fire pit that is placed in the middle of a table. Whenever setting up comfort features like this, do a test run to make sure the flames won’t get too close to the people around it. Designs like this also benefit from having a removable grill top on top of the fire pit so that it can double as a cookout area.
Water getting into the fire pit when it is not used will make it harder to start a fire, even hours after the rain has stopped. Consider making or purchasing a cheap fire pit cover to keep water out when it is not being used. You don’t need anything fancy, just something sturdy enough to stay put when there are strong winds. Even if the cover is light, putting a brick on each side of it will keep the fire pit secure from water and other dangers.
Natural gas users should never go cheap or do a rush job with gas lines. Never leave the line exposed, and always follow directions when handling these complex setups. The rule with natural gas fire pits is low upkeep but high planning to get the project started.
Consider placing a drain inside of the fire pit so that rain doesn’t collect. A drain is useful for when you forget to place the cover on the pit. This isn’t foolproof, but it will save you hours of time when prepping the area for a new fire.
Try not to use soft woods in your fire pit. Cedar and pine fit this category, but there are a few more to avoid. Soft wood is known for sparking, throwing sparks and being otherwise unpredictable while lit. Even when you have the correct wood, disposing of the ashes when the fire is done is a necessary maintenance technique.
Video Resources
Useful Fire Pit Ideas
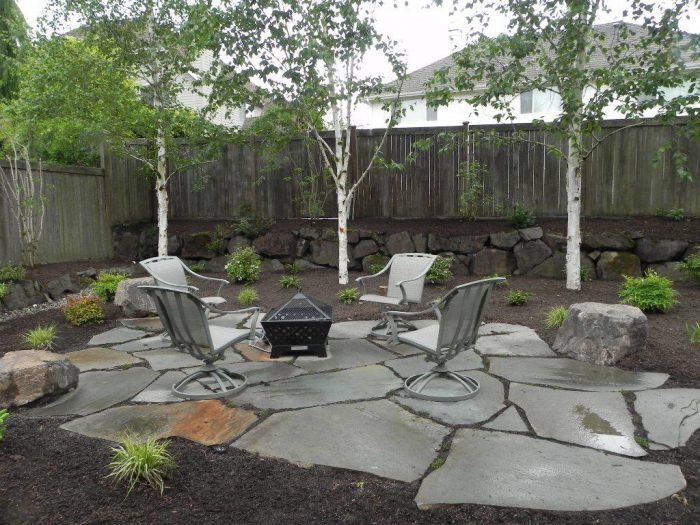
You can make your fire pit and its surroundings intriguing or dramatic and keep the fun rolling way past the sunset. The beauty of installing any outdoor feature is that you can be creative and come up with designs that best define your landscape. Here are some few fire pit ideas that that can make your fire an interesting spot to spend your chilly evenings.
A Stonehenge Type of Fire Pit
You can create a traditional setting with this type of a fire pit design and achieve a magical set-up that reminds you of a special gateway only that it’s in your backyard. To achieve this kind of a setting, you will need to excavate the area surrounding your fire pit instead of clearing it. This will include the seating area. You can then cover the ground with flat pavers, and for a more dramatic display, you can choose to plant some grass seeds in between the pavers.
Create a Magical Secrete Hideaway
You can go out of your way and make your fire fit pit place more intriguing by taking advantage of your backyard space. You will need to do a bit of digging to create a pathway and lay some flat logs leading to the ‘secret campsite.’ This kind of a scene at the far end of your backyard looks absolutely stunning and charming.
A Fire Pit Table
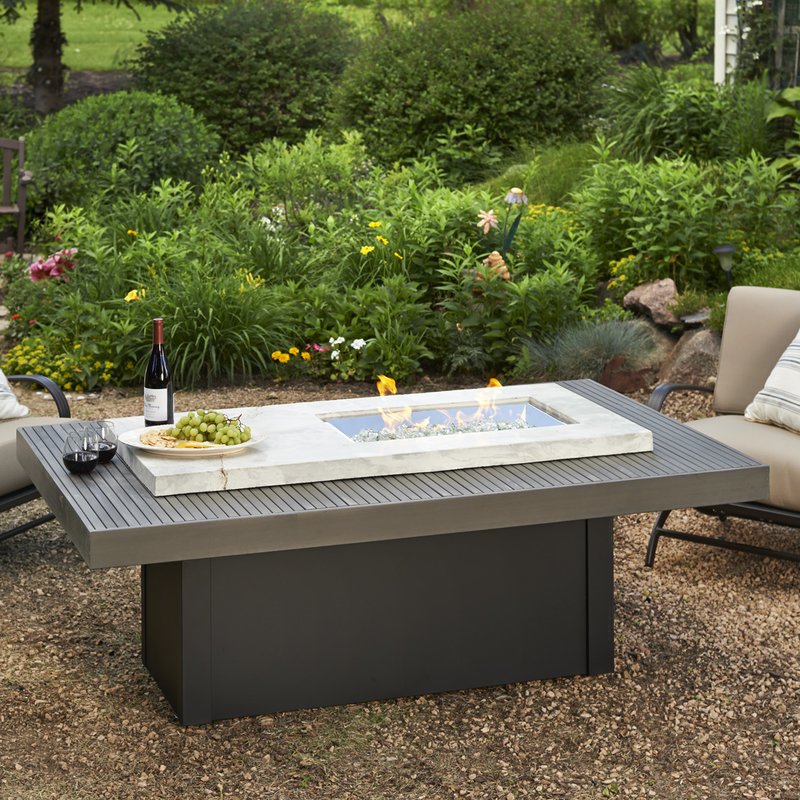
Adding a fire pit table on your fire pit can simply transform it into a functional space especially during warmer months. Fire pit tables can typically be installed on any fire pit that is built with even pavers. You can transform your fire pit with a fire pit table at the cost of $90. Make the fire pit table more dramatic and appealing by applying several coats of wood finish.
Cityscape Set-Up Fire Pit
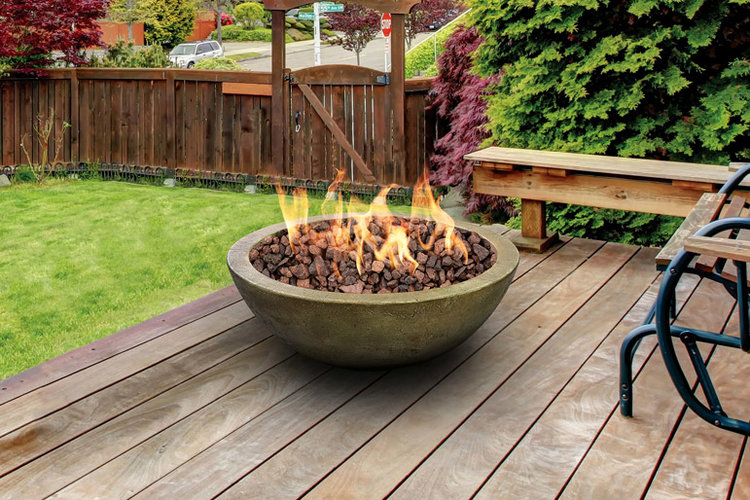
If you are a city dweller, you can do with a cityscape design which looks quite impressive with a modern touch. You can add this fire pit design to your deck or patio using crossfire burners. All you need to do to achieve this design is to build your fireplace base with pavers, add a gas burner and then finish it by installing decorative stones. Most gas fire pits are available in the form of kits which makes their installation pretty easy.
These are just but a few among hundreds of fire pit ideas and designs that can transform your fire pit into a visually appealing feature. You can opt to have round, square, rectangular, half a wall, fancy bricks or even stacked up stones fire pit designs. You can also go for a rustic look or subtle and modern look; the type of design you chose for your fire pit will boil down to your taste and preference.
Conclusion
Fire pits, when properly installed and designed, they become a centerpiece in your backyard. From in-ground fire pits to pre-made installed fire pits or even portable above ground units, a fire pit unit is an outdoor feature that should not be missing in your outdoor living space.
Fire pits not only provide warmth during the cold weather, but they also lit up your space and create a magical campsite scene at night. They are practical spots for hosting parties and entertaining your guests as you snuggle around the fire and chat the evening away. They serve as an outdoor cooking spot, and you can have fun with your kids toasting marshmallows.
The market has many options for fire pits. Before you begin installation, you have to consider the type of fuel to use, position, safety features and seating area. Whichever design you settle for, make sure you follow the installation procedure and seek the necessary permits. As you plan for a fire pit installation, take your time and shop around for a fire fit design, style, and size that best fits your needs and enhances your outdoor appearance.