- No Obligations
- Stop Paying Too Much For Your Contractor
- No Spam Calling
- Screened & ID Checked Contractors only!
DIY Floating Shelves: Design, Mounting Tips & Tools to Use
3
 DIY Floating Shelves: Design, Mounting Tips & Tools to Use
earlyexperts.net
DIY Floating Shelves: Design, Mounting Tips & Tools to Use
earlyexperts.net
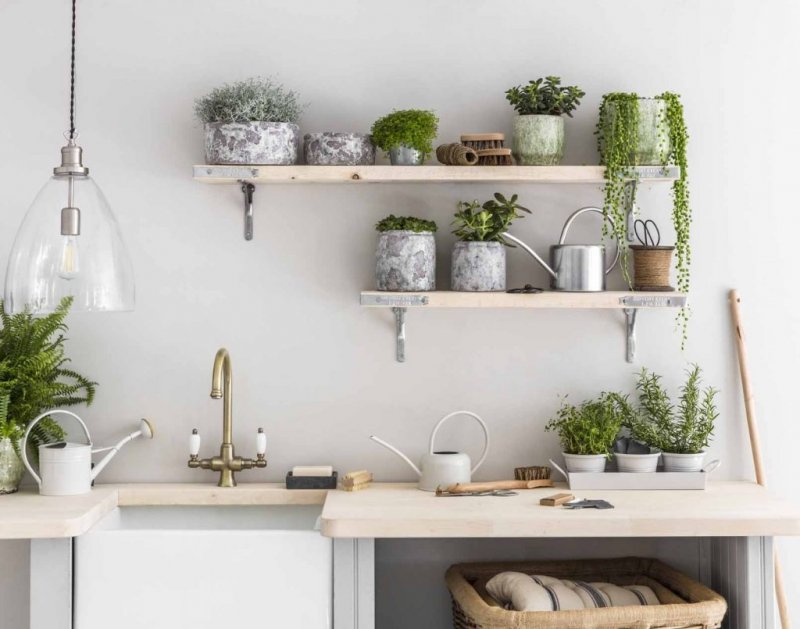
Nowadays, homeowners will do just about anything to free up as much space in their floor plans as possible. The open, airy aesthetic of modern homes is a beautiful look. That said, the living rooms on TV and magazines leave a lot of folks wondering where in the world do they store anything?
The quick answer is that these spaces are staged and their probably is not anything to store. That doesn’t mean you can’t cash in on the same spacious style without sacrificing somewhere for books, linens, and other decorative knick knacks.
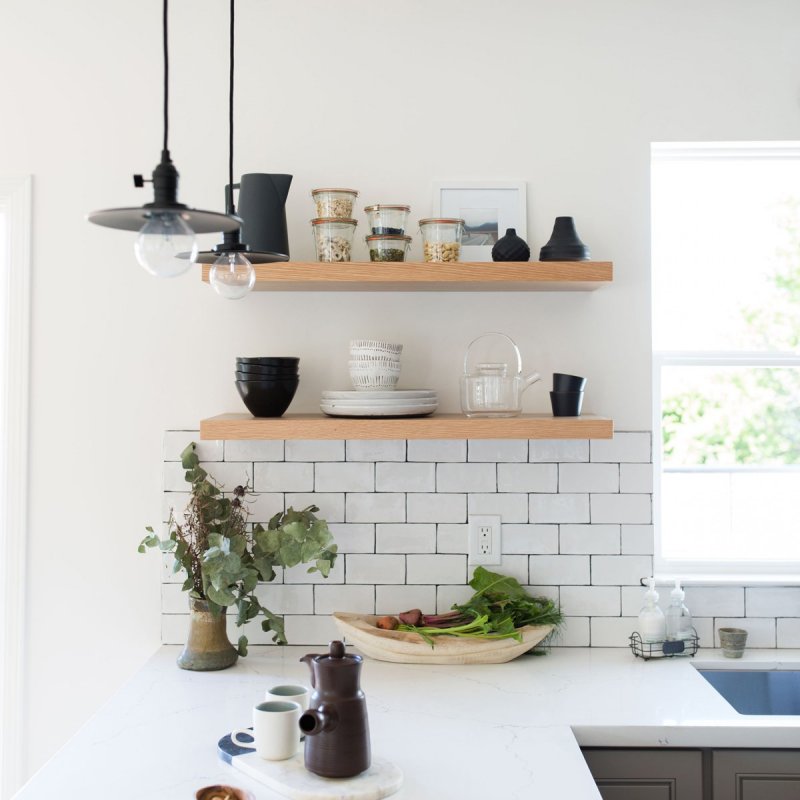
The answer lies with, or on, the floating shelf. While there are many styles of shelf type, what you choose is mostly dependent on the feel and design of your home. The fundamentals of how these extra storage spaces and showcases magically hold things are by and large the same. Here is a step by step guide for creating your own floating shelves:
Materials, Tools, and Design Choices
Even if you are new to the world of DIY, you can certainly make this magic a reality. All you will need are some basic tools:
For the tools listed above, there are some contingencies. First, the nail and screw sizes not listed because depending on what material you are using for your shelving you may need different sized nails and screws.
Also, not everyone has access to a circular or table saw, and unlike the other items on the list, this is not something you should go out and purchase for the sake of this project. Your best bet is to find a handy friend, or go to a hardware store where they will cut your material to size for you.
You may also want to paint your shelves which will add an additional step and some other purchases like sandpaper, brushes, primer, etc. All of this is based on design preference. One thing that is not is the depth of your shelves. You don’t want to exceed nine inches or the integrity of your shelf might be compromised based on the weight of whatever it is you are ultimately housing there.
It should also be noted that these are hard to remove without ruining them. That said, this is a fairly inexpensive DIY project, so that wouldn’t be the end of the world. Still, avoid that all together by being certain of your shelves’ locations in your house before you get started.
1. Identify and Mark
Once you do have the long term location identifies, trace a horizontal line where each shelf will be positioned. Use a level as your straight edge. This way, you are not only getting a straight line, but one that is level to the floor as well.

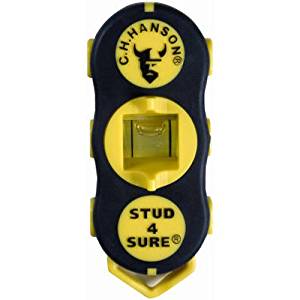
2. Find the Studs
Place your stud finder flush to the wall and drag across the horizontal line you have traced. The stud finder will notify you when it has located a stud with a light or a sound. Mark these points vertically (perpendicular to the shelf line) with painters tape.
You need to make sure your shelves are long enough so that they span across two studs, at least. Rule of thumb on stud location is sixteen inches on center, so if your shelf is eighteen inches or greater in length you should be good. The close you get to the next integer of sixteen in length, the more you will need another stud.
3. Cut
Measure your material to length. Mark with a pencil line using a straight edge, then measure again to be sure. Using your circular or table saw, follow the guideline across the face of the board. Be sure to push the saw beyond the edge of the face to ensure you have made a complete straight cut. You will want to use a forty-tooth carbide blade. These are the best specifications to ensure smoothness.
If you end up with a little bit of a rough edge, simply hit it with some 150 grit sandpaper until it is sufficiently smooth.
4. Measure the Edge
Using your measuring tape, find the width of the material on its edge. You will need this measurement so that you can fashion cleats for your shelves.
For cleats, you want to use straight, dry lumber, so avoid cheap common board. It is likely that you can find cleats that fit the width of your material’s edge, however custom is better since the tighter the fit, the stronger the shelf will be.
5. Cut and Attach the Cleats
Cut the cleats to length ¼ inch shorter than that of the shelf material itself. Follow the same cutting guidelines above. Once you have done so, predrill ¼ inch in diameter holes at the stud locations along the shelf line that has been previously marked.
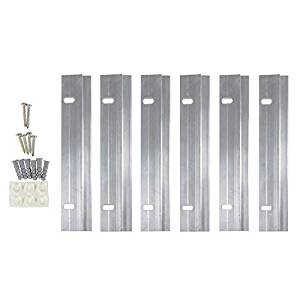
Hold you cleat to the wall over the holes, and using a ⅛ inch bit, pre drill the cleat itself. Using a wrench, install one lag screw into each stud until it is tight. At minimum, for very light shelving material, you will want to use a ¼ inch lag screw. For heavier loads, you can get up to 3 ½ or so.
6. Chisel Space for the Cleat
Using a chisel, cut away at the edge of the shelving material at least 1 ½ inch, or to the size of the cleat. You want to make sure this space fits snug to your cleat so underestimate if possible.
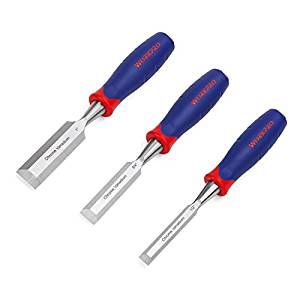
It also might be helpful to use a router for this job. Again, this is not something that needs to be purchased, but it is helpful if you have a friend with a good set of power tools or access to an affordable rental facility.
7. Test Fit
Dry fit the chiseled shelf over the cleat to make sure it fits snugly. Too tight is better than too loose, here. If you have to, you can always chisel out a little room for your cleat to fasten down more securely. Light sanding of the inside pocket may also help to create a smoother fit.
With the shelf fit to the cleat, trace a new pencil mark for where the back, top edge of the shelf meets the wall as a future reference point.
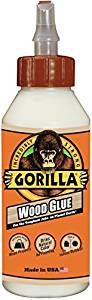
8. Glue
Apply glue to the top of the cleat and the inside of the chiseled pocket. Slide it on and let dry.
9. Secure the Shelf
Once the glue has set, use small bad nails to fasten down the shelf for good. At the back end of the shelf, accounting for the size of the cleat, drive a brad nail every eight inches. Make sure to account for the the width of the shelf edge when choosing nail size so that you do not drive through the bottom of the shelf.
Conclusion
To summarize, floating shelves operate using a cleat and pocket system. This is also by far the most complicated part of the project and the need for precision in this phase is paramount. That said, when choosing shelf material, pick something wide enough on its edge so that there is room for error.
In addition, while going out and purchasing power tools for this project is not necessary, it’s always a good excuse to build your collection. Worst case scenario, you hide them away on a set of floating shelves you build for your workshop down the road.
Most Read


Easy DIYs to Improve Your House Appeal
Apr 06, 2021

How to Remove a Garbage Disposal: Step by Step Guide
Apr 06, 2021

Find Out How to Plant a Pineapple in Your Garden
Apr 06, 2021