- No Obligations
- Stop Paying Too Much For Your Contractor
- No Spam Calling
- Screened & ID Checked Contractors only!
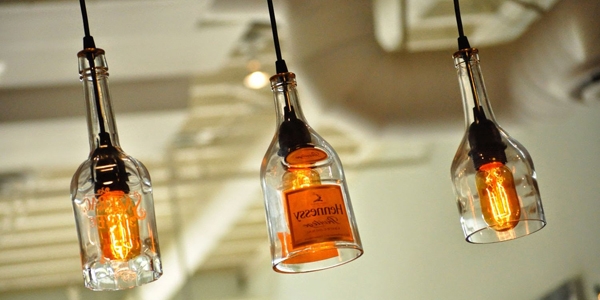
DIY Pendant Lights: How To Build Your Own
1
 DIY Pendant Lights: How To Build Your Own
earlyexperts.net
DIY Pendant Lights: How To Build Your Own
earlyexperts.net
Sometimes browsing through catalogs or stores searching for the perfect lighting to add to your kitchen or living room will leave you feeling more than a little underwhelmed. Everything that you’ve come across is either too plain, too ornate or just not well made. Luckily, instead of being frustrated and buying lighting you don’t quite like consider taking matters into your own hands. You can create your own lighting fixtures and pendants for less than purchasing them directly from a store. Don’t know where to start? Not a problem. We’re going to tell you how you can make your own pendant light.
First, let’s start off with where to find your pendant.
Take a look around your home. Old wire baskets, mason jars, metal bowls, and more can be used as the frame for your new pendant. Make sure that anything that you pick is wide enough to fit the bulb into it. If you are having trouble finding something at home, consider popping into a thrift store or flea market for unique finds that are easy on the wallet.
Now that you have the outside of the light, now it’s time to put it together so that it will work.
Materials Needed and Cost
- Pendant – free if you upcycle one from home
- Light Kit – $5-$25 depending on style
- Power Drill – $25 and above
- Swag Hook – $3-$12 depending on style
- 8-10 ft Chain – $.99-$2 per foot
- Pliers – $5 and above
- Screwdriver – $3 and above
- Light Bulb – $6-$45 depending on type and number of bulbs in the pack
Before starting, make sure to have all of your materials out and ready to go. The lamp kit will consist of a few different parts that come together to help your pendant properly function. If you are using a jar with a lid or another material that doesn’t have a hole in it already, you will need to drill one into it that is large enough for the cord to go through.
Step 1 – Take the outer shell from the kit. You will need to thread your cord through one side. Make sure that the cord has the two prongs exposed since you will need to work with these later.
Step 2 – Continue to thread the cord through the pendant opening, making sure that the outer shell is still attached. It will rest on top of the pendant and support the rest of the lighting fixture below.
Step 3 – Take the neck also known as the “spindle” of the lamp and thread the cord through it. Make sure that the cord goes through the narrow part.
Step 4 – Continue to pull the cord so that you’ll have a foot or so of slack. Don’t worry, you’ll tighten everything up in the end.
Step 5 – It’s time to attach the two exposed prongs to the socket. The socket will have a sleeve covering it to prevent the lamp from overheating. For now, set the sleeve aside and use your pliers to bend the prongs into a hook shape.
Step 6 – Take one prong and wrap it around a screw on the socket. Then take the second prong and wrap it around the other. Use the screwdriver to tighten the screws around the prong.
Quick Tip: Unfortunately, not all lamp kits are the same. Some will say which prong goes where and others will not. If you turn on the lamp and it doesn’t come on, then you’ll need to switch the prongs that you wrapped around the screws.
Step 7 – Reattach the sleeve to the socket.
Step 8 – Pull the cord through the cord through the rest of the pendant until the socket connects with the neck.
Step 9 – Attach the chain to the pendant and intertwine the cord with it. You’ll need to make sure that the chain is strong enough to support the entire pendant.
Step 10 – Use the power drill to place a hole in the ceiling where you want to put the swag hook. Once the hook is in place, you’ll hang the pendant light making sure to leave enough room to plug it into an outlet.
Video Resources
Conclusion
Now you know how easy it is to create your own stylish pendant lamp. This low-cost DIY project is perfect for those who want to add extra interest to their room with a unique, newly recycled item found in the house. Spending a little time creating your lamp will give you much more pride and satisfaction. This is obviously better than going with a more expensive option. So now it’s time to see what else you create at home.
Most Read

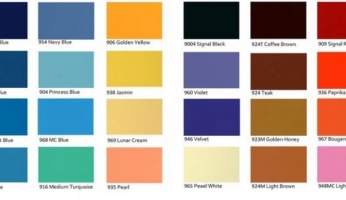
How To Mix Paint Color: A Beginners' Guide
Apr 06, 2021

How To Flush A Radiator: A DIY & Best Tips Guide
Apr 06, 2021

How to Remove Rust From Tools: Tips That Work!
Jul 20, 2018