- No Obligations
- Stop Paying Too Much For Your Contractor
- No Spam Calling
- Screened & ID Checked Contractors only!
How to Hang a Picture Without Damaging the Wall or Paint?
1
 How to Hang a Picture Without Damaging the Wall or Paint?
earlyexperts.net
How to Hang a Picture Without Damaging the Wall or Paint?
earlyexperts.net
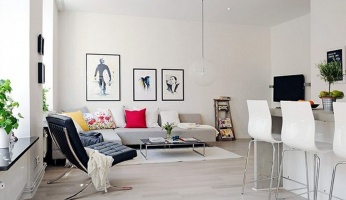
You’re fed up of looking at those plain four walls that surround you, and have decided to liven the place up with some pictures. Great idea, but there’s just one snag. You rent the place and you know that if the walls get damaged in any way a large chunk of your deposit will be taken up with repairs. So how do you brighten your room, and at the same time make sure the walls and paint aren’t damaged.
Think Ahead
If you’ve already got some artwork in mind, that’s a great start. So start looking at the walls you have available, and where it will sit better in the space. Remember, if you are going to put a piece of artwork in an area that gets lots of direct sunlight, it will probably bleach and fade over time. This is likely to happen to posters, and photographs, which have been printed rather than paintings that have been given a protective varnish. Another way to stop bleaching is to place your artwork behind ultra-violet protective glass, when framed. This will keep the colors, but can give more muted tones to the piece, and the special glass has a premium price tag.
Try to find places where the artwork will be easy to see. This usually means hanging the pieces at eye level. You don’t want to get a neck ache straining to see one of your favorite pictures high up on a wall, just because it’s covering a bit of blank space.
Consider the weight of the piece of artwork you are going to hang. If it is heavy, then you will probably have to use some kind of tack to secure it on the wall. To do that you will need to make sure it is fixed to one of the stronger studs rather than the drywall. The easiest way to find out where the studs are hidden behind a particular wall is to use a stud finder device. These handheld battery powered tools can locate studs, and electrical wiring behind the smooth surface of your wall, and are available from home improvement stores and online.
If the piece of artwork is heavy or big, then consider making a thin paper template to replicate the dimensions of the piece so you can move it around the walls without straining your back or temper when looking for the ideal spot to place it. Wherever you decide to mount the artwork, measure the space, and the piece and work out how it should be mounted so it symmetrically fills the area. If you have to resort to drilling a hole or putting a tack into the wall, then the template will make it easier to get the exact position. With thin paper you can either knock a tack or drill through the paper so there is no need to be concerned about getting the fixing in the right spot for your artwork.
Getting on with the job
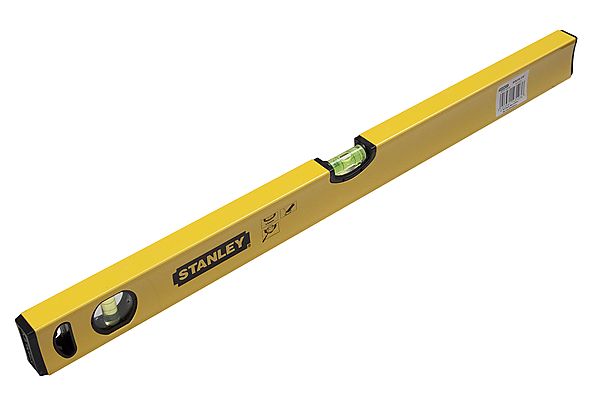
Wherever you decide to hang your piece of artwork, measure the wall you are going to mount it on, and make sure the edges are straight and level. A picture hung correctly will always be perpendicular to the ground, but if your walls are not straight, then your artwork may look crooked, even though it’s not. A ruler with a straight edge, or a spirit level are both a great help. If you don’t have one, then there is likely to be an app for your smartphone that will do the job of a level.
Consider the weight of the piece of art you intend to mount on the wall. If it is large with an elaborate frame, then it could weigh a lot, so it will need to be secure otherwise it might damage your wall. For pieces that are light or of a medium weight adhesive, or special mounting pads will probably suffice. However, if the artwork is framed and behind glass and has an ornate frame, then it might be appropriate to use picture hooks of something more substantial fastened to the wall studs to ensure it does not fall.
There are basically four methods to mount artwork on the wall. If you have taken all the steps outlined previously about making sure you are placing the piece in the right place, then there should be no damage to the walls, and your security deposit will be safe.
Adhesive Hangers
In almost all cases, these disposable hooks will leave no residue or damage on a wall when they are removed. The most well known is probably 3M’s Command Line product, which is available in a number of different sizes for various weights of artwork to be wall mounted. A lot of people are skeptical that these small strips will do the job, however, experience has shown that they hold their grip and last a long time and will take a relatively heavy item such as a framed mirror.
Using them is very simple indeed. The two separate parts of the strips should be mounted to the frame of the artwork and the wall. All about 30 minutes for the adhesive to cure, before mating the pieces back together again with the artwork stuck to the wall. When you want to replace your picture with another and want to remove it from the wall, it’s very easy to do. Just pull the exposed tab on the end of the hanging stick, and it will come away from the surface without leaving a mark.
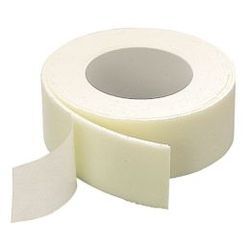
Hook and Loop
Most people know this kind of fixing by its trade name of Velcro. This type of wall mount for artwork is more versatile as it can be cut to fit the shape of the item being put on the wall. Also the nature of the hook and loop fastening means that the item can be taken down, for cleaning say, and replaced quickly and simply. Hook and loop tapes come in a variety of sizes, and a range of grades depending upon the weight they are expected to hold. The two parts of the tape have an adhesive backing so they can be fixed to the wall and to the piece of artwork you are going to mount. It is important to allow enough curing time for the adhesive to properly bond to the wall and the piece before mounting, and adding weight to the joint.
Putty and Tape
If the item you want to mount on the wall is very light, such as a small poster, or something you have cut from a magazine then regular packing, masking, or double-sided tape can do the trick.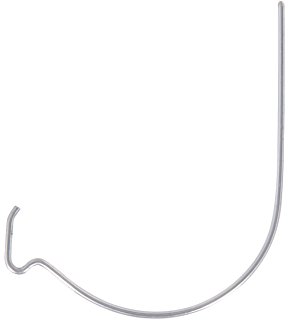 Make sure the walls are smooth and free of any dirt of dust before using tape to mount your artwork. With so many tape colors available, they can also be used to enhance the look of your piece as well. Try not to use tape as a permanent solution to mounting your artwork. Over time the adhesive will degrade and lose its sticking power. It may also change color, and begin to leave a discoloration on the surface, thus defeating the object not damaging the wall. Vinyl putty is great for walls that are painted, as modern paints do not soak chemicals from the substance and leave a stain when it is removed. Again, this is best used lightweight items, what will probably not have a frame.
When there has to be a hole
When your artwork is framed and behind glass, the safest and most secure way to mount it is to use a picture hook. That will mean you will have to put a small hole in the wall – the smaller the better. Sometimes a staple or thumbtack is all that is needed. Push it gently into the wall, it can be used to mount the hanging wire found on the back of framed art pieces. Specialized picture hooks use thin tacks which need to be hammered into the wall to make them secure. These work best when mounted into a stud for extra security. If the artwork is heavy, mounting straight into the dry wall may lead to the pins being pulled over time, and leave a larger and more noticeable hole. The other simple option when mounting into a dry wall is the Monkey Hook. This J-shaped hook looks like a simple piece of wire, however, its clever design means that once slotted through a very small hole in the dry wall and twisted into place it can hold up to 50 pounds without breaking.
If none of these are going to work, then consider placing your artwork on a table and prop it up against the wall. If you have a few items you would like to display, then how about looking for a large old frame at a flea market, and mounting your pieces inside that. I will take all the hassle out of measuring and will look good.
Most Read

Apartment VS Flat VS Condo: What's The Difference?
Apr 06, 2021