- No Obligations
- Stop Paying Too Much For Your Contractor
- No Spam Calling
- Screened & ID Checked Contractors only!
How to Install Peel and Stick Tiles on Walls, Floors, in Your Bathroom
0
 How to Install Peel and Stick Tiles on Walls, Floors, in Your Bathroom
earlyexperts.net
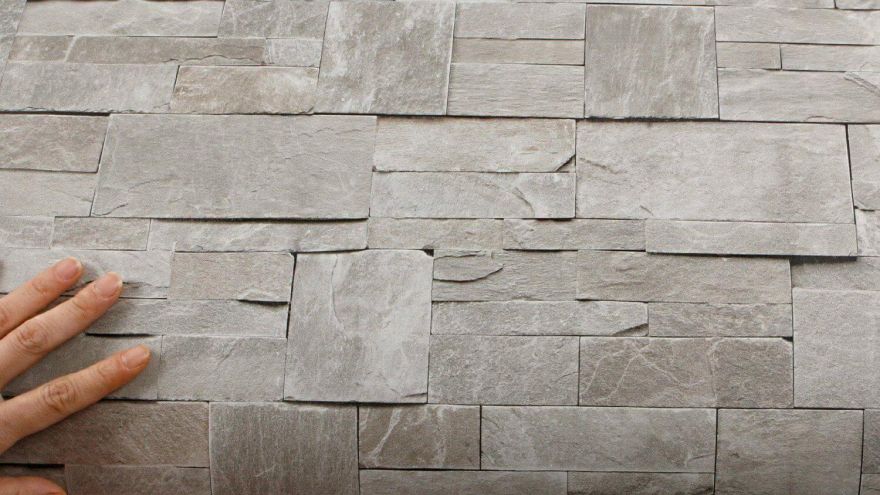
Vinyl tiling has many uses and applications around your home. While vinyl is often used for flooring, there are scenarios where it works well on walls.
When vinyl tile is used on walls it is typically done in bathrooms and kitchens. That said, it is not built to be used as backsplash or shower tile. It simply cannot handle that much water exposure.
It can, however, be a wonderful accent within a backsplash design that is mostly comprised of conventional tile. Some homeowners even use vinyl for create entire accent walls. In this case, they enjoy not only the pop of color or pattern, but the added benefit of an easy cleanability.
The best part about vinyl tile, though? It is super do-it-yourself friendly! In this article, we provide a DIY guide to peel and stick vinyl tiles and offer some pro tips sure to help you make the most of your project no matter the job type or location.
Tip 1: Clean the Surface
One of the most important things to do as preparation for your vinyl tile job is to clean the surface well. This will ensure the tile’s adhesive works to its fullest potential and grips the surface well for years to come.
To do this, use a solid, household cleaner that leaves as little residue as possible. Try to avoid those that are gritty or have crystals or porous textures. Cleaners of this consistency are more difficult to rinse.
Your main concerns should be to take care dirt and dust. These are the most detrimental factors to the integrity of the adhesive.
Once the surface has been cleaned, be sure you allow enough time for it to completely dry. Even a damp surface will not allow for maximum adhesion by the tiles.
Tip 2: Extra Adhesive
Just because the tiles themselves are peel and stick does not mean you cannot use an additional adhesive. The fact of the matter is the adhesive on the back of vinyl tiles wears off quickly. Depending on where you use your tile and for what purpose, you may notice tile starting to come loose or pop off completely after only a few months.
Leverage the tiles peel and stick quality with an extra adhesive material. You can use a conventional glue that is meant for plastics, but if you do, you will need to make sure the material is spread evenly over the surface so that your new tiled surface is perfectly flush.
To facilitate this, we recommend a spray adhesive. The spray will allow for a more even spread. Just be sure to crack a window and take any other measure you can for proper ventilation.
Tip 3: Spend Some Money
There is reason why certain peel and stick tiles are so cheap. Vinyl is generally less expensive than conventional tile, but if you opt for a style, brand, or pattern that seems particularly economical, chances are they will begin popping quickly.
This just means you will have to replace the tile before you were prepared to. Thus, the money you saved on the cheap stuff is short lived, as you are forced to spend it later on repairs.
Check to see if wherever it is you are buying the tile has products in stock that come with a warranty. If it comes with a warranty, it is likely a pretty decent tile.
Install Your Own Mosaic Tile Wall
What You’ll Need
- Screwdriver
- Sponge
- Tape Measure
- Peel and Stick tile
- Grout
- Adhesive
Step 1: Measure and Plan the Install/Prep
First, measure the area you want covered. If it is a backsplash, measure between the countertop and the bottom of the lowest cabinet to get a sense of how much tile you will need. If an accent wall, get the square footage for the whole wall.
Either way, try to be as exact as possible so you do not waste any material. Depending on the space you may need to cut some pieces. Once you do, be sure to dry fit one more time before you begin applying the tiles for real.
In addition to measuring and planning, you will want to prep the surface by removing any outlet or switch covers and cleaning the surface thoroughly. Follow the guidelines for cleaning products outlined above.
Step 2: Adhesive
Next, apply adhesive to the wall itself. Make sure the wall is dry before you do so. Use a spray adhesive to ensure even coverage. This will also help keep the finished product completely flush.
Step 3: Tiling
You will need to begin tiling quickly before the adhesive has a chance to dry. That said, it is not a big deal if you have to reapply a quick spray of adhesive.
Start install from the bottom up. Use one tile at a time, or is you are using mosaic style vinyl, pull back half a sheet at a time.
Most peel and sticks will allow you to remove a piece up to two times before it begins losing its ability to stick, or untill pressure is applied.
It is also important to make sure the grout lines line up the way you want them. Once satisfied with the layout of an individual piece, press it in place to ensure it sticks wells. You can use a flat trowel or rubber mallet to create added pressure.
Step 4: Grout
Not everyone wants grout and depending on the tile type or design it might not be necessary. Generally, though, it is good practice to work grout in between vinyl tile pieces. Not only will it add extra adhesion, but it gives you surface a nice clean, professional finish.
Apply the grout direct to a flat trowel. Hold the float at a 45 degree angle, and swipe the grout across the face of the tiles in an upward, diagonal motion. Repeat in the opposite direction to make sure you really work the grout in completely.
Step 5: Sponging and Cleanup
With grout filled in each and every gap evenly, you have also smeared it across each tile face. Using a sponge, wipe the surface of the tiles clean of grout.
Make sure not to wait too long before you begin sponging as the grout can dry fast and once it is stuck to a particular tile, you might be hard pressed to get that piece clean.
When sponging, keep a clean water source present so you can wring out the dirty sponge regularly. This will allow you to actually wipe the surfaces of the tile clean rather than simply moving wetted grout back and forth across the tile faces.
Video resources
Floors
Kitchen Walls
Conclusion
Once the grout has dried, you can use a grout sealer to lock in the the individual tiles and to strengthen and protect the grout itself. Once this is done, you are good to go.
Your vinyl peel and stick tile is an inexpensive alternative to conventional tile. It is equally durable, lightweight, and a viable option for seasoned masons and novice DIYers alike.

