- No Obligations
- Stop Paying Too Much For Your Contractor
- No Spam Calling
- Screened & ID Checked Contractors only!
How to Remove & Replace Caulk to Make it More Durable
0
 How to Remove & Replace Caulk to Make it More Durable
earlyexperts.net
How to Remove & Replace Caulk to Make it More Durable
earlyexperts.net
Home repairs factor into the joys of homeownership. While some might require a calling a professional, there are quite a few fixes that you can take on yourself. One of the easiest repairs that you can do in your home is the removal and replacement of old caulk. This is especially important to help prevent moisture from penetrating wood and creating larger–and often costly–issues.
So why is caulk so important? Caulk is generally used to seal openings at the edges or corners of windows, walls, and floors. It’s made from various materials and is definitely not one size fits all for every part of your home. We’ve got a few recommendations as to which type of caulk will work best. And of course, tell you how to remove and replace the caulk to ensure that your home’s nooks and crannies stay moisture-free.
What Are the Most Common Types of Caulk
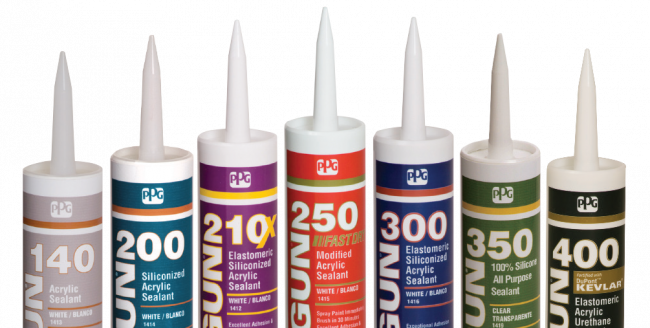
There are a number of different types of caulk available in hardware stores and even big box discount stores. However, you can’t just use any old caulk. Some caulks are only meant to work indoors in areas like kitchens and bathrooms. Others will only work outdoors. So let’s get into the most common caulks.
Silicone – This is the material that people are most familiar with when it comes to caulk. It’s usually clear, with a rubbery, smooth surface. Silicone is quite durable and excellent for filling in spaces surrounding windows, doors, and other outdoor areas. Due to its flexibility, silicone is perfect for non-porous surfaces.
Latex – Often used indoors, it is less flexible than silicone and perfect for areas that rarely fluctuate in temperature. This material can be painted over and also comes in various colors, which helps make it easier to match to neutral tones. It’s mainly used around interior doors, window trim, and ceilings. Latex is also a long-lasting material and can last upwards of 20 years.
Acrylic – Many people enjoy the ease of cleaning that comes with using acrylic caulk. You can apply it in the same areas as latex, but acrylic can also be used around electrical panels. One thing to keep in mind is that this type of caulk is sensitive and will shrink and crack at extreme temperatures.
Acrylic-Latex-Silicone Blend – This combines all three of the most common caulks into one hybrid. As such, this material can be used both indoors and outdoors. So whether you need to seal gaps around window frames or harder surfaces like brick, this material works in many applications.
Caulk for Kitchens and Bathrooms – For areas that have higher moisture levels, this caulk helps to seal cracks and crevices around bathtubs, toilets, and sinks. Not only will it fill those spaces, but this material prevents mold and mildew from penetrating it.
Butyl Rubber – Often used to fill in areas that need a strong and durable material. Butyl rubber caulk can last upwards of 10 years and comes in a variety of colors to match against brick, stone, and concrete.
Caulking Cord – While this is generally a temporary fix, caulking cord can be cut to size and placed to fill in smaller gaps. Just remember to replace this caulk with a more permanent solution since this will only last for a couple of years.
How to Know When Caulk Needs to Be Replaced
It’s easy to overlook the smaller details when you have so many other things to maintain in your home. However, it’s important to keep an eye out for anything that needs attention. Gaps between windows and loose frames are ideal for the wind to enter your home causing an uncomfortable draft. This is especially painful for your winter heating bill. Check the interior and exterior of doors and window trims for any spaces that can be easily filled with caulk.
Also, make sure to look for any missing sections, loose caulk or cracks are signs that it’s time to take out that putty knife. If you notice any mold or excessive mildew, then you’ll need to replace the caulk before the mold spreads to other areas of the bathroom.
How to Remove Existing Caulk
The process to remove caulk is relatively easy but does require a little elbow grease. Here are some tips for removing caulk from surfaces both indoors and outdoors.
Step 1 – Removing caulk becomes easier when you give surfaces such as tile a deep cleaning before re-caulking shower or bathtub. Removing any dirt and grime will ensure that you are working on a smooth surface.
Step 2 – Apply caulk remover or solvent. If you don’t particularly like using solvents, you can also use rubbing alcohol to help break down the surface.
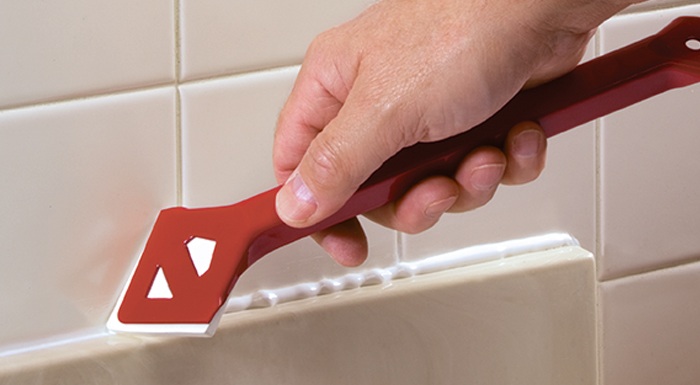
Step 3 – Using a putty knife or tool specifically meant to remove caulk, begin scraping it away. By pushing the tool beneath the edge of the caulk, you can pull it upwards to remove it more easily.
Step 4 – Remove any remaining bits using a toothbrush, hook, or stiff brush.
Step 5 – Begin preparing your surface for the new caulk by cleaning it with alcohol. If you have concerns about mold, you can make a solution with ⅓ cups of bleach to 1 gallon of water and apply it to the surface.
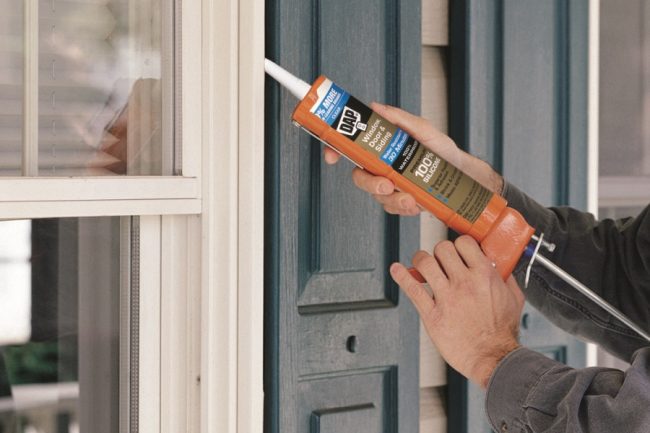
Step 6 – Apply the new caulk in a strip and smooth using a caulking tool.
Conclusion
Finding a durable, long-lasting caulk is a small investment that will yield years worth of protection for your home. Taking a little time now to make this simple repair will save money in the long run. One of the most important factors to consider for caulk is the temperature and moisture level where it is going to be applied. Places like the bathroom require a sealant that is waterproof and resistant to buckling under intense humidity. However, the paneling around windows needs to use a caulk that is good for all temperatures in addition to being water resistant. Once you find the right caulk for your needs, replacing the old caulk is a quick fix that will ensure that the crevices of your home remain secure.
Most Read


Faux Brick Wall: The Best Tips to Make It Look Real!
Apr 06, 2021

How to Whitewash Wood: Quick Tutorial
Apr 06, 2021