- No Obligations
- Stop Paying Too Much For Your Contractor
- No Spam Calling
- Screened & ID Checked Contractors only!
Organic Gardening: Is It Expensive and Where Do I Start?
0
 Organic Gardening: Is It Expensive and Where Do I Start?
earlyexperts.net
Organic Gardening: Is It Expensive and Where Do I Start?
earlyexperts.net
There is no denying the value in shopping and eating organic. The pesticides used in the preservation of our fruits and vegetables are weighed and measured for their potential harm in dozens of studies each year. To date, scientists can draw pretty clear lines between pesticide ingestion and health hazards like cancer, Alzheimer’s, ADHD, and general birth defects.
The answer to these public health crisis seems pretty simple: shop organic. Easier said than done. You would think organic food would be less expensive than conventional food since organic farmers do not incur the production costs associated with chemicals, antibiotics, and pesticides. As with “fat free” or “gourmet”, however, the word “organic” has simply become another marketing tool allowing producers of organic food to brand their products as such, thus justifying a price increase.
So what can we do? As the old saying goes, you can’t fight city hall, or in this case, the food industry. Certainly you should join the efforts that are waging that war, but in the meantime, you need to eat.
One simple solution exists in your own backyard: starting an organic garden of your very own. Unlike shopping for organic food, growing your own is actually less expensive to DIY gardeners because of the lack of synthetic and chemical components you will use to cultivate your future dinners. And since there is no middle man to jack up the price, you’ll be saving a good deal of money.
In this article, we will show you exactly how to build an unlimited supply of fruits and vegetables to hold you over while you help work to burst the organic marketing bubble.
What is Organic Food?
Before we get down to the nitty gritty of how to, it is important to outline what is truly meant by organic. To put it simply, food that is organic does not have pesticides, genetically modified organisms, synthetic fertilizers, ionizing radiation, sewage sludge. It is just you, some basic garden tools, the earth, the sun, and a regular irrigation schedule. And if you’re feeling fancy, there ARE organic products on the market to stimulate growth, but it is important to note that these will drive the starting and maintenance costs of your garden.
Getting Started!
If you are starting your organic garden from scratch, you are going to need to put together a collection of some basic garden tools.
- Clippers
- Trowel Set
- Soil Test Kit
- Compost Bin
- Garden Gloves
- Watering Can
Once you have these, you are ready to dig in!
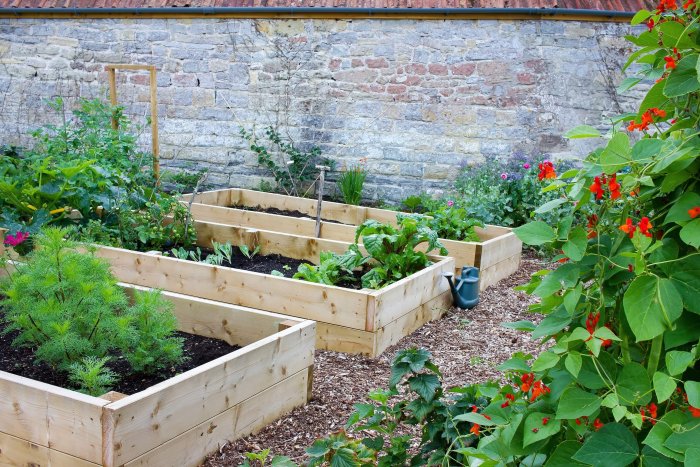
Step 1: Steak Out Your Future Garden
This is one of the most important steps in the process. You garden needs to sit in an area that gets alot of sun that is also easily accessible to a water source. If you have a small yard that gets alot of light, you are in luck. Regardless though, every home has at least one spot that gets six or more hours of direct sun, and the water source issue can be easily solved with a couple hose runs.
It is also important to consider the size of the garden. You cannot build beyond the area that receives sunlight, or the plants on the outskirts of your garden will not develop properly. That said, you should go as big as you can within that area, and that you can reasonably maintain.
Some notes on size
Once your garden is up and running, it may produce a surprising pick. Often this is more than people anticipate and they cannot keep up with the volume. Gauging how much of each season’s pick you can actually eat takes some trial and error. Ultimately though, nothing is wasted. You can always gift your extra or explore jarring options, which will keep you in the green with vegetables for the whole year.
Within the garden itself, you need to be cautious of spacing. Plants that are grown too close together will become entangled, which will stunt their growth and potential fruitfulness. A good rule of green thumb is to allow 10-18 inches between plants depending on what is growing. For instance, cabbage plants can be spaced every 10 inches, but potatoes and lettuce need closer to two feet.
Step 2: Preparing the Soil
Once you have marked your garden, it is time to get that space ready for optimal growth. Just as we have to eat, so do our plants, and so it is vital that the soil in your organic garden is chock full of nutrients. The best way to gather information about your soil is to have it tested.
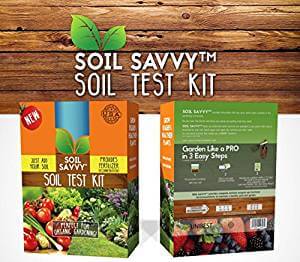
With a home soil testing kit, you can find out a lot of what you need to know,. However, for a small fee you can also send your soil out for professional testing at an agricultural center. In their report, your local agro office will completely break down the composition of your soil from pH levels to nutrient density. This report may also provide treatment recommendations if your soil is not testing up to the highest quality standards. Regardless of the treatment options suggested, you will want to feed your soil a healthy dose of humus.
Humus is the organic component of soil, comprised of leaves and other plant materials that are decomposed by soil microorganisms. This is the life that moves through your soil to produce new, fruitful growth — the life cycle of all living things exemplified. 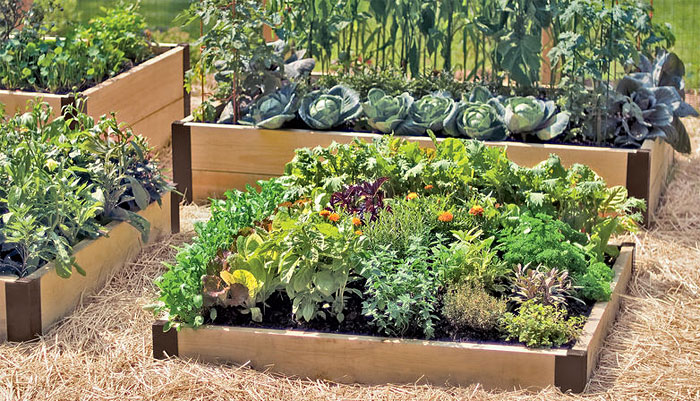
Mix your humus in kitchen compost, grass clippings, and composted manure from local, organic livestock.
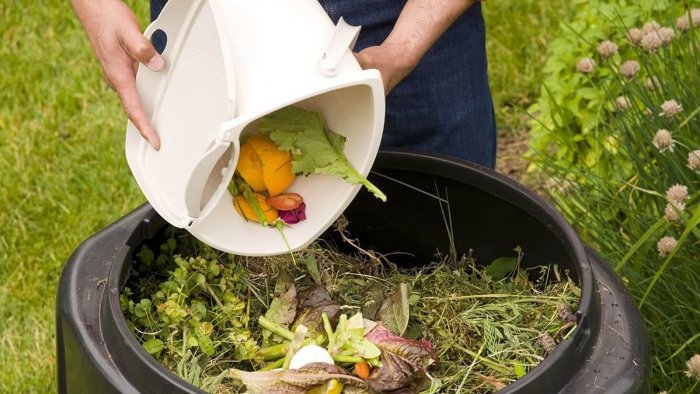
Step 3: The Perfect Compost
Compost will feed your plants with nutrients and help to conserve water in your garden. It also will prevent weed growth and can reduce your own waste as what was once trash can be repurposed as plant food. You can mix your compost within the loose soil in your staked garden area, or simply spread it around the plant roots.
The perfect compost is characterized by the right nitrogen to soil, water, and air ratio. That might sound like the task of building a compost pile requires much oversight, but really anything, no matter the ratio, will benefit your garden in a big way.
Here is how its done:
- Designate a space at least three square feet on which your pile can accumulate. You can also purchase (or make) a bin or casing of some kind to house your compost.
- You build compost like a lasagna: in layers. Start with brown stuff (leaves and plant material). This is the carbon base. Then, add the nitrogen, or the green stuff (kitchen scraps and manure), with some soil in between. Rinse and repeat!
- Once you are nearing the peak of the pile, you’ll want to garnish your compost lasagna with four to six inches of soil.
- Keep turning the pile over as you layer to mix it all in, and make sure you are keeping it damp. The moisture will facilitate microbe action.
PRO TIP: Your compost pile should not smell. If it does, you will need to add more dry, brown carbon (leaves, straw, or sawdust) and mix it more often.
Step 4: Pick Your Plants
It is really helpful to do your homework with this step and pick plants that you are certain will do well in your neck of the woods. The USDA’s Hardiness Zones is a valuable resource here. It will outline what types of plants grow well based on light, moisture, drainage, and amount of soil.
Since you are planting organic (i.e. without chemicals and pesticides), it is difficult to start from seedlings. In order to do so, you need to make sure the original seeds were not themselves grown synthetically. You will likely be able to find these at local farmers’ markets. Look for seedlings that do not have many blooms yet, and whose root systems seem more organized.
From seeds, you can organically foster some plants easier than others. For example, coriander, dill, sweet peas, squash, and cucumbers sprout into stocky seedlings relatively easier than others.
Step 5: Crop Organization
Since you will be harvesting your organic garden, you will need to create some sort of crop system that makes it easier for you to move through the garden to pick. Part of this system should account for the grouping of like plants, which will help to maximize irrigation. Plus you will know what you are growing!
Raised beds are a great way to organize your garden. This way you can plant in rows of soil that extend off of the ground’s natural level. The rows should have ample space in between so that you can walk through the garden, but also to promote air circulation, which will repel fungi from attacking your crops.
Step 6: Watering
This part of watering seems pretty simple. Everyone knows plants need water and light for photosynthesis from their grade school biology class. However, there are some nuances to irrigation of your organic garden that can help maximize results.
First, is timing. Watering in the morning is always best because the temperature tends to be cooler and there is less wind. That means more water gets to the plant roots and is not evaporated by the sun’s heat or blown wayward.
You may also water in the evening for the same reasons, however, the plants will stay damp over night when the temperature really drops, which will make the crops more susceptible to bacterial and fungal attacks.
It is important that you remember that plant growth happen sin the roots and not the step, leaves, and fruit. While sprinklers are convenient and serve a purpose, the best means of watering is with a slow drip system that purposefully waters the base of plants.
Once crops are established, you do not need to be as systematic about watering. About one inch of watering, including that from rain, is all that is needed to maintain healthy plants.
Step 7: Keeping the Weeds Out
The fact of the matter is weeds grow everywhere and are hard to avoid. Because we are going organic with our gardens, we cannot resort to chemical based weed killers. That said, we still have some options.
Mulch, wood chips, and straw work pretty well to discourage weeds, but can become costly over time. The best bet is some sort of burlap weed blocker if you are using a raised garden structure. This will separate your healthy, composted soil from the ground soil, where weeds will come from. While you still may have some unwanted visitors popping through, the amount will be manageable enough to pick by hand.
Step 8: Protecting Your Plants El Natural
Without chemicals, your crops are vulnerable to many different kinds of hungry critters. Still, there is much you can do to deter these thieves of the night from stealing your family’s dinner.
Natural predators such as frogs, toads, lizards, birds or even bats can be the guardians of your garden if you are able to recruit them. Leaving a small source of water nearby to attract friendly predators is helpful, as is planting fragrant plants.
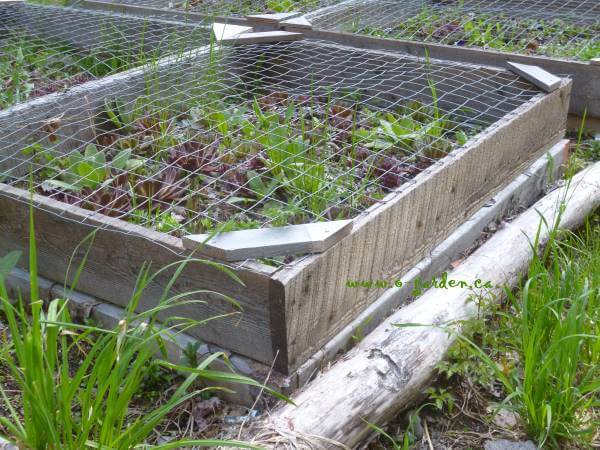
You may also use nets and row covers to physically protect your crops. This is easier if you are planting in a raised garden structure. You can even raise walls or fences around your structure. Some simple designs incorporate the use of 4X4 posts and chicken wire fencing.
Step 9: The Pick is Good
When it is harvest season, you will want to pick a little each day. For herbs and spices, you can pick as needed, treating your garden as an outdoor spice rack. The best time to pick herbs is mid morning just after dew has dried. That is when they will be most flavorful.
For fruits and vegetables, pick from their designated row at random, or a little from each plant in no particular order. Make sure when picking, you are using a knife, sharp scissors, or clippers rather than physically ripping from the plant. The latter causes damage to plant tissue that can have long term effects on re-growth.
As you pick, keep your eyes out for dead or compromised plants. You will need to get rid of those ASAP, but you cannot just pick off yellowing leaves. Pull the entire plant up from the roots and lay it to rest in a separate location far from your healthy garden. Be careful to also rake out the soil underneath as dying organisms leave trace bacteria and disease in the soil around their roots.
Conclusion
If you’ve made it this far, congratulations. You are officially an organic farmer. Not as difficult as the inflated prices of organic foods in grocery stores would have you believe, right?
With your newly acquired knowledge, you can now set out to gain some valuable experience as a gardener. In just a few short seasons, your start-up garden will be a big producer, keeping your wallet, refrigerator, and spice cabinet in the green for years to come.
Most Read


How to Remove Spray Paint from Skin and Surfaces
Sep 17, 2018

How to Remove Rust From Tools: Tips That Work!
Jul 20, 2018