
- No Obligations
- Stop Paying Too Much For Your Contractor
- No Spam Calling
- Screened & ID Checked Contractors only!
What can you do with a wood router?
What does a wood router do? The wood router can do a lot more than cut fancy edges. It will also cut flawless dadoes and rabbets and create the most perfect wood patterns. The wood router is a tool that is used to rout out or to hollow out an area of a relatively hard workpiece and other materials. Of course, the main purpose of the wood routers is in woodworking and carpentry, especially in the cabinetry. This versatile tool is also commonly used as a plunging tool and also can be inverted in a router table.
Wood routers originally began as hand-powered tools, but have evolved steadily into the electronically-powered spinning routers of today. The original form of the wood router was first presented as a hand tool form, with a broad base and a narrow blade projecting well beyond its base plate. The today’s power wood router tool is a modern form of router with an electric motor driven spindle is the most using common form and the hand tool is called in that case router plane. It consists of a flat plane with a rotating shaft or bit sticking out of the bottom. An electronic motor powers the shaft, causing it to spin rapidly.
Today, there are plenty of wood routers styles, some are plunge, some are D handled, and some are double knob handled. Different manufacturers produce the modern routers for different wood working, and today most of the wood routers are equipped with variable speed controls and have plunge bases that can also be locked in place so the router can also be used as a fixed base router, some are with soft-start features that means they build up their speed gradually and this feature is particularly desirable for routers with a large cutter.
What can you create and maintain with a wood router? Just look around and in your house. Picture frames, kitchen cabinets, desks, edges, doors. You can also be very creative and cut multiple holes in the wood in order to create more decorative woodwork. If you’re creative not just woodwork but the wood router will serve you as an excellent tool to use for cutting and trimming of plastic, metal and laminates.
Wood routers are used on flat pieces of wood to trace designs, often held in place with clamps. The design is drawn on the wood beforehand to make tracing easier. Wood routers have made recreating exact replicas in furniture easy, and have revolutionized cabinetmaking, edging and scroll work, and precise cutting. In this article we want to give you a brief description of what you can do with a wood router.
The process of routing
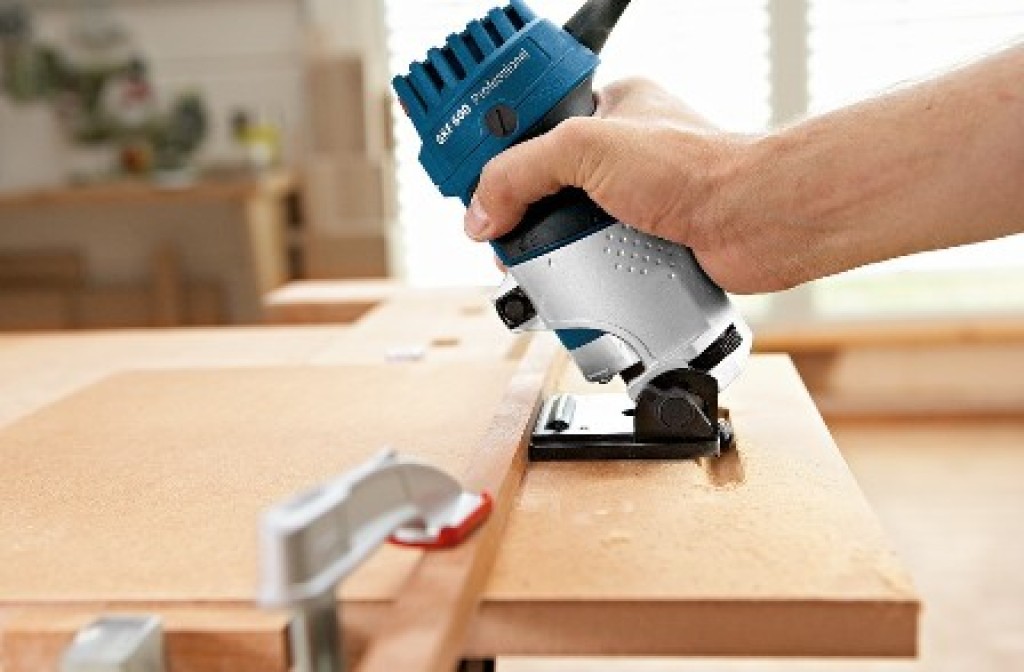
Routing is the high speed process of cutting, trimming and shaping the wood, metal, plastic and variety of other materials. Wood routing is a shaping process used to produce finished edges and shapes. Some materials that are difficult to shape with other processes can be shaped and finished neatly with a various routing techniques.
For some lighter jobs using a wood router can be more convenient than the spindle moulder and can do the job much quicker.
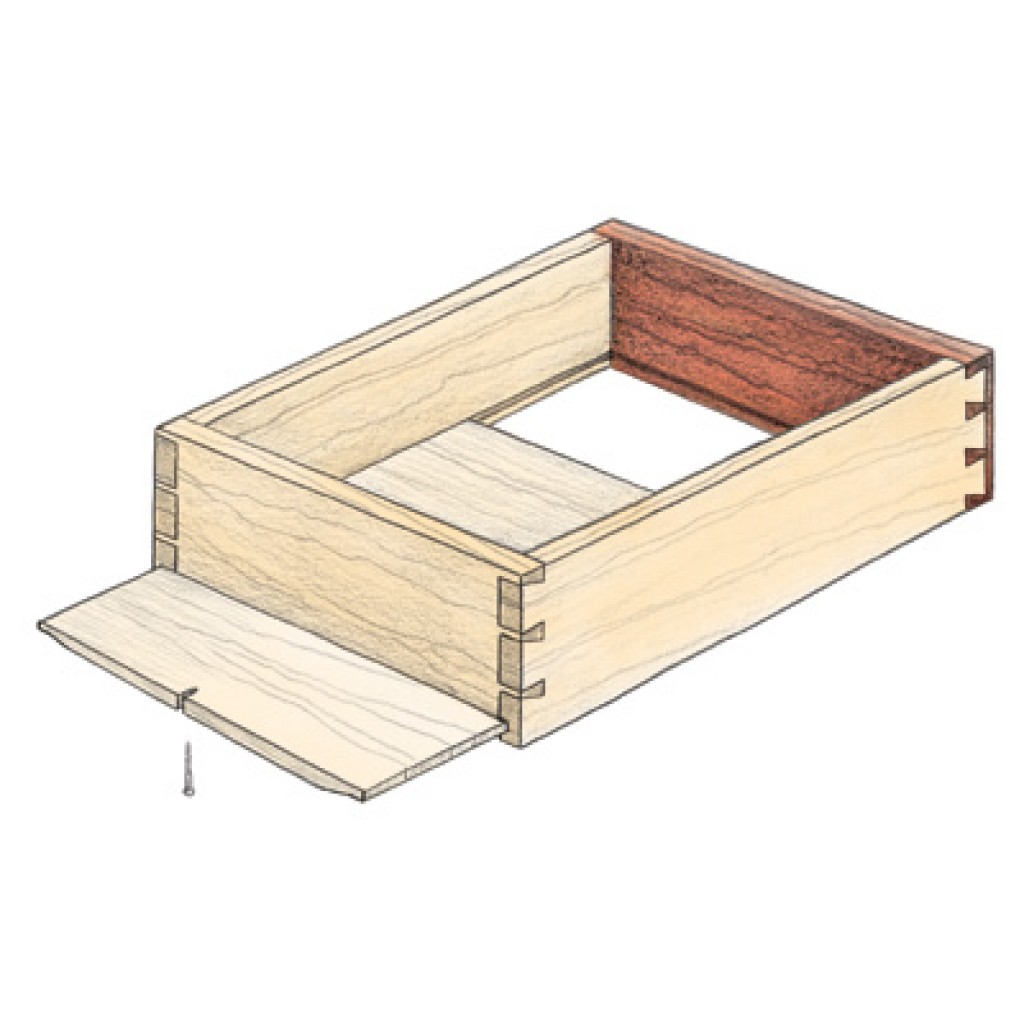
Using the wood router to build boxes and drawers
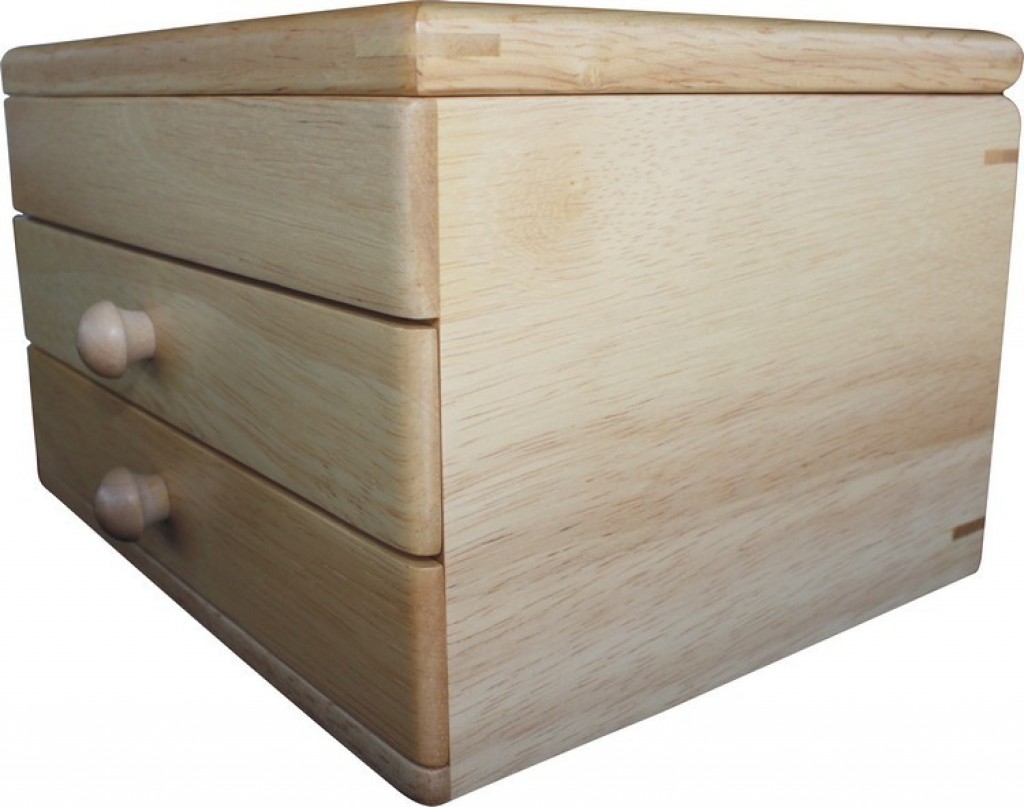
Since the beginning of the woodworking (around 5 millenniums ago), woodworkers are making boxes and drawers from wood. In that period, they were making them from only one chunk of wood. That is because with the tools they were using back then it was not possible to do a box that is looking like the one above quickly and with that precision. They didn’t had the wood router back then.
As soon as the power tools step on the woodworking scene, the hand tools were used less and less. Today a number of wood boxes, joints and drawers can be created with the wood router.
When making a drawer with your wood router you need to make the grain direction run from side to side so the bottom of the drawer. This will press the drawer sides out, making bind or stick in the opening.
Make the drawers precisely the same size as the drawer openings. They’ll be too big to work properly but you can use your handplane or the belt sander to take just a little bit of stock from the outside surfaces in order to get the perfect fit.
If you decided to create a one-board wooden box with the help of your wood router, make sure that you rout out the cavity in several passes cutting no more than 1/8 “ with each pass until you’ve reached the desired depth. Start routing the circumference of the cavity, and keep the pilot bearing pressed against the pattern. Then just move the router back and forth to clean out the waste in the cavity.
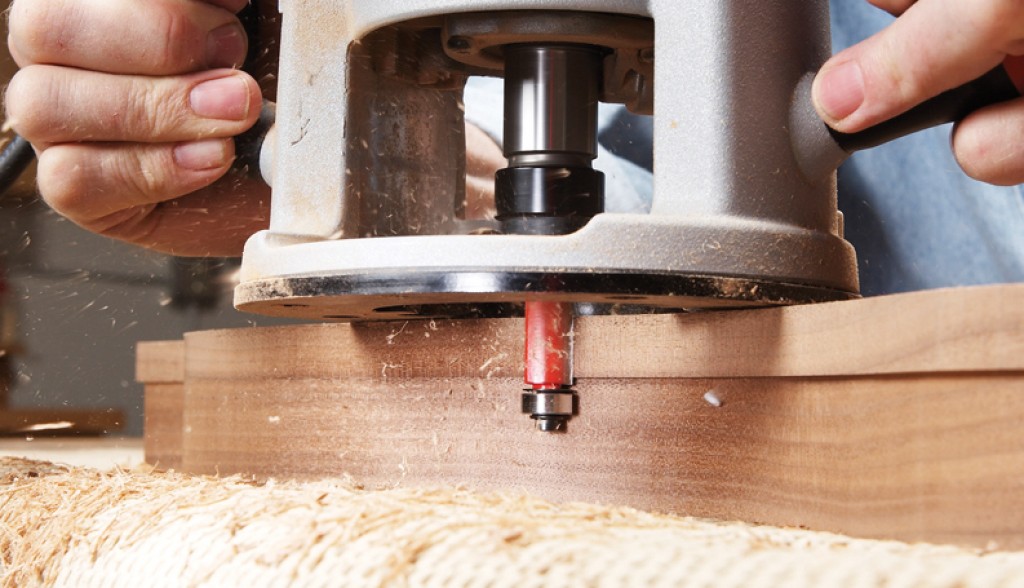
Routing the edges of the woodpiece
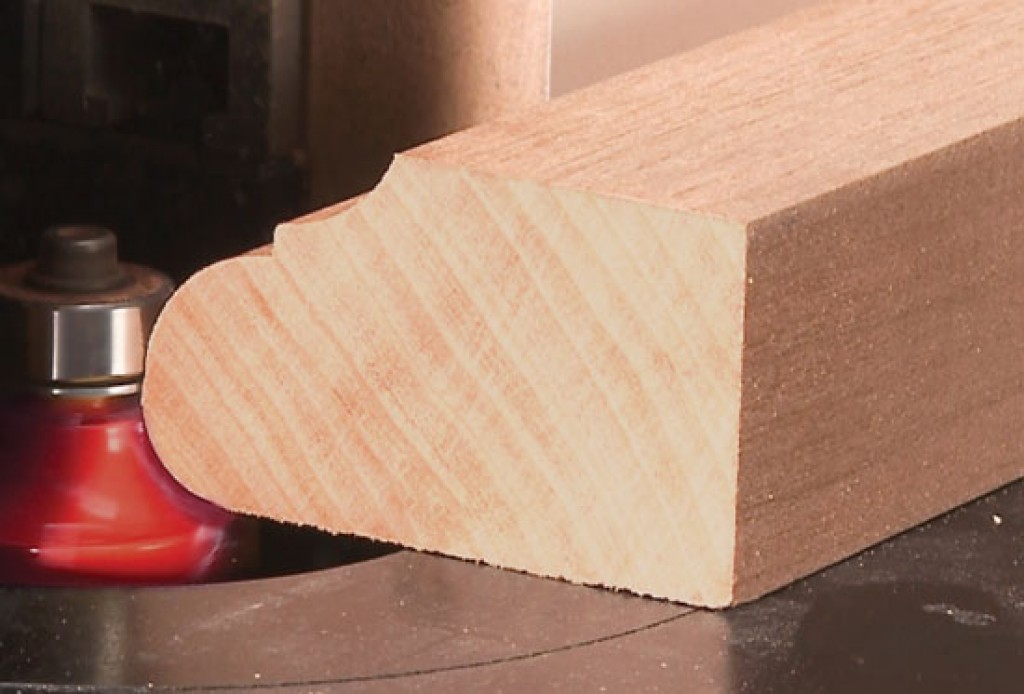
Woodworkers shape edges. That’s what they do. The reason for shaping edges is both aesthetic and practical. Because the edges most often trace the outline of the project, shaping the edges really emphasizes and enhances the design. Also the edges are easier to cut that the faces with a wood router.
With the help of a wood router, you can achieve the most perfect edges and the most unblemished dadoes and rabbets while cutting precise patterns. The main thing that you need in order to cut the most perfect edge profiles is the sharpness of the bit! Also make sure to work with the router in a counterclockwise direction around the top of the workpiece. With counterclockwise way of working with the wood router, the bit pushes the router toward you rather than pulling it away, so it’s easier to control the router and be safer while you work.
If some parts of the wood chip away at the corner, start solving the problem by “climb-cutting” (or cutting clockwise now) for a couple of inches on the end grain at the “northeast” and “southwest” corners of the board. Then start anywhere on the workpiece and run the router around the wood counterclockwise. But if you’re edge-routing the inside of something, like a picture frame, you should rout in a clockwise direction.
Cutting dadoes
The most pure and strongest way to support shelves on the side of a cabinet are dadoes. A dado is a square-walled, flat-bottomed channel that is cutted across the grain of the wood. (When it runs with the grain, the channel is called a groove.) You cut a dado or groove into one board, and the end of a mating board fits into it. One well-placed, properly sized cut makes the joint.
In order to create a dado, fist buy a bit for your wood router that matches the desired dado width so you can make the cut in one pass. Clamp the jig (front and back) on a test piece of wood, then set the straight bit 1/4 in. deep and make a pass through the right side of the “T” part of the jig and into the wood. Check the new dado with a square to make sure the jig is square and you’re ready for the real thing. Plan and mark the dado locations on the workpiece, then line up the jig’s groove with your layout marks, clamp the jig to the wood and start creating the dado.
Cut only on the right side of the jig and push the router away from you; the turning direction of the router bit will pull the router base against the jig. If you rout on the left side of the jig, the router will tend to wander away from the jig and you’ll wind up with a run-amuck dado.
Rabbet cutting
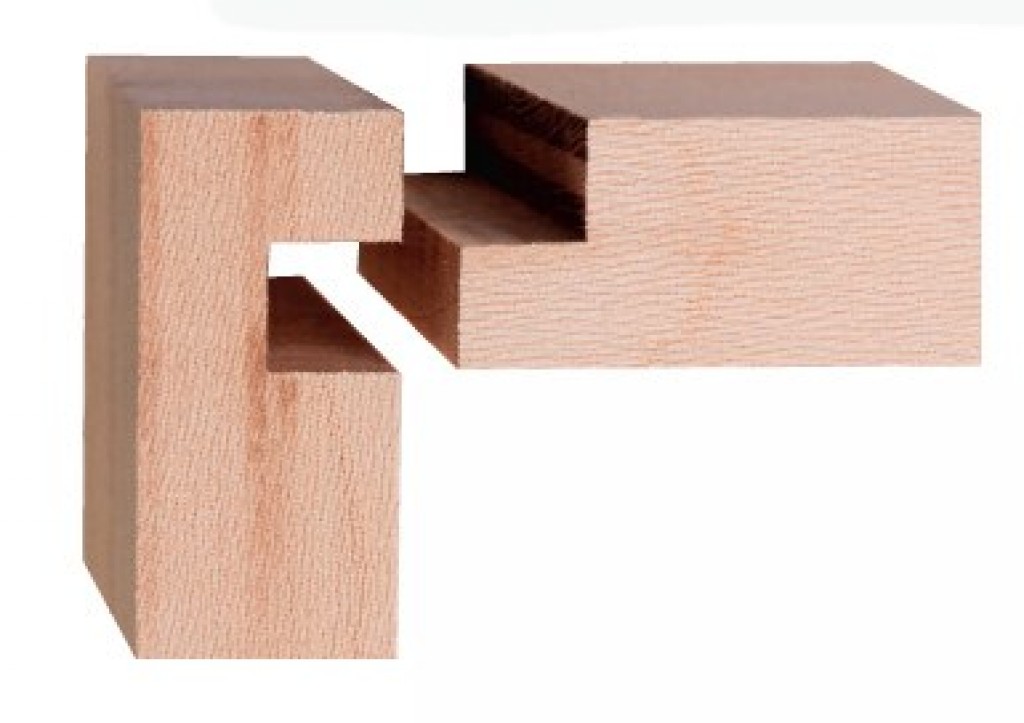
Rabbets are one of the first joints new woodworkers learn, and then never stop using. Rabbets are easy to make with a router, and are effective in many situations. You may need different rabbet sizes, but a simple rabbeting bit will do the job.
Even when a table saw and dado set is available, rabbeting with a router may be faster and easier. Using a router can eliminate having to disturb the setup of another machine that may still be needed for the project. In most cases, the quality of rabbets produced by a router are at least equal to those made with other machines.
In order to create rabbets with your wood router, it is required to use rabbeting bits. Rabbeting bits are usually larger in diameter, that’s why you have to pay attention on the router speed (rpm) as a point of consideration. It is crucial for safety and good performance to follow the exact recommendations of the bit’s guide and router manufacturers guide too, regarding the router speed and the size of bit that is being used. If your do not own a router that has a variable speed control, you should check the documentation that came with the wood router and read more about the operating rpm (that is usually listed on a plate on the router itself also) to see if it is compatible with the bit that you are using to create rabbets.
How fast you will move the router along the wood directly affects the quality of the rabbet that is being produced. If you move too quickly splintering or tear out can occur. And if you move the router too slowly you may cause burning of the wood.
For rabbeting smaller pieces, use a router table. In a router table, you can use a simple straight bit to cut the rabbet or you can use a rabbeting bit with a bearing guide.
Inlaying banding
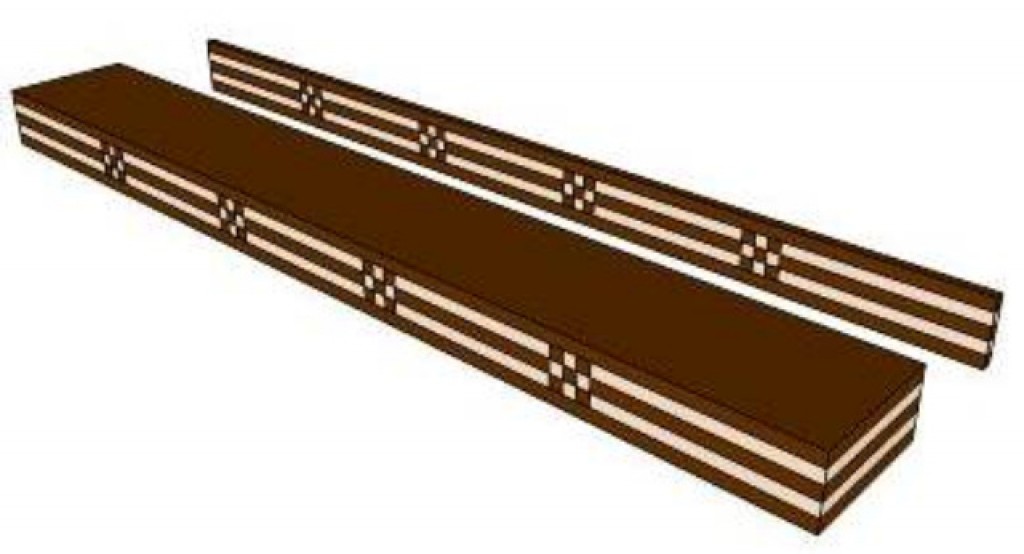
You can decorate wooden surfaces easily by cutting shallow mortises and filling them with inlaid strips of veneer, patches of marquetry and parquetry, slabs of mother-of-pearl, strands of wire, colored epoxy and so on.
There inlaid objects are small and intricately shaped, which is why not only the shape must be correct, but the depth must be accurate too. One of the best tools for this kind of work is the wood router.
In order to inlay a straight banding for example, start by measuring its width and thickness. Then rout a shallow rabbet, dado or groove to fit it by using hand-held or table-mounted router. After you are done with cutting the recess, just glue the banding in its place.
If the inlaid materials that you will be using are rather thick, you will need to rout a recess that is slightly shallower than the thick inlay. In that way, it will protrude just slightly over the surface of the wood. Use routing to recess to the precisely right depth.
Dovetails
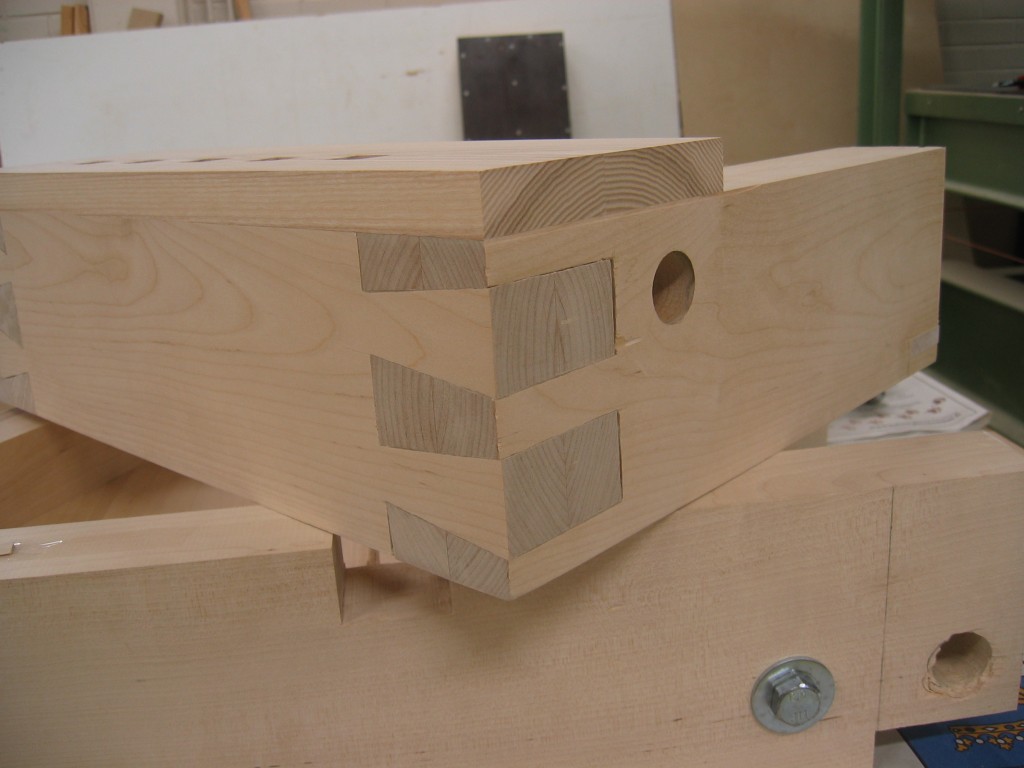
This is the hallmark of woodworking craftsmanship. Dadoes alone have little mechanical strength, but with the addition of a dovetail socket and a dovetail tenon, the joint will be properly aligned and solid.
There are three basic dovetail joints: half-bling dovetails, through dovetails and sliding dovetails. The wood router is the only power tool that is able to create all of them!
To successfully make a housed dovetail joint there are some tooling and setup requirements. The dado has to be at least ¾” in width to be able to allow a ¾” guide bushing to ride into the dado to create the dovetail socket. The stock thickness for the drawer should be identical to the width of the dados.
When you already have the pre-cut sockets ready, just switch the router setup to the dovetail bit. Clamp the workpiece on you work table, lock the depth of the router’s bit, and turn on the router. The dovetail bit and the bushing guide should locate the dado when the router is slid along the face of the case slide.