- No Obligations
- Stop Paying Too Much For Your Contractor
- No Spam Calling
- Screened & ID Checked Contractors only!
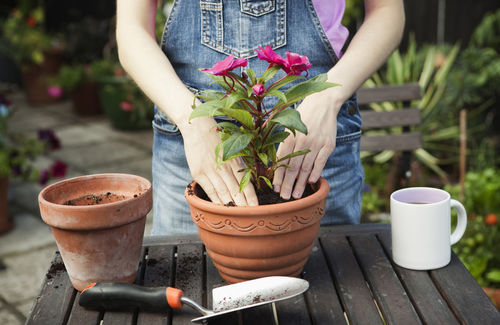
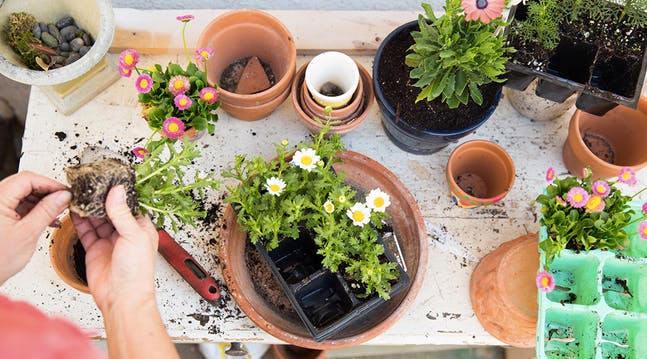
When, Why, and How to Repot a Plant
0
 When, Why, and How to Repot a Plant
earlyexperts.net
When, Why, and How to Repot a Plant
earlyexperts.net
With winter setting in, us gardeners are in for a long stretch of no soil in which to dig out green thumbs. Still, if you are anything like us, then it is likely you have some potted plants you’ve brought inside for the colder months.
These are either annuals you have dug up to keep in bloom throughout the year, or plants you want to get a jump on over the winter so that they are ready for the spring.
Regardless of the reasons, at some point you will need to repot.
While the verb in and of itself seems to suggest a pretty straight forward process of removing the growth from one pot and placing into another, it tends to be slightly more complicated than that.
In addition to the how, there is understanding the reasons behind repotting in the first place. In this article, we outline all of this so that come spring, your potted plants will be poised to soak up every ounce of spring sun, optimizing their growth all season long.
When
There are two ways of gauging when is the right time for repotting. The first involves a general evaluation of the size of the plant. This happens in unison with the time of year. In theory, your plants will begin to outgrow their pots around the end of winter.
Here are some other, more specific signs that it is time for your potted plants to upgrade their real estate:
- The plant has all but stopped growing
- The leaves are lightening dramatically
- Water runs immediately out of the bottom of the pot without soaking up the soil
- The plant has grown top heavy and keeps tipping in the pot
- The plant’s roots are exposed through the surface of the soil
Why
The why behind repotting kind of speaks for itself. Ultimately, the reason is to promote optimal growth in your potted plants. Certainly some plants outgrow their pots and so they need to be repotted. That is a good thing, a sign that you are doing your job as a plant owner.
Another reason you might want to re-pot suggests the exact opposite, however. For plants that have been neglected for a period of time, one way to salvage them is to re-pot with fresh soil.
If your plants are super healthy and nearly full grown, rather than repot you could get away with refreshing the top layer of soil.
How
Now that we’ve explored the timing and the meta why behind repotting, we can get to the heart of the matter, the how.
First, you’re going to need some supplies:
- Trowel
- Gloves
- Scissors
- Potting soil
- Planting pots
For potting soil, be sure to choose something quality and specific to the type of plant you are potting. There are plenty of plant types that need unique mixes like citrus trees, orchids, and cacti, for instance.
The pots you use are of equal importance. If the pots do not have drainage holes on the bottom, they are not worth using at all. The holes should not be all that much bigger than your plants current pot. Your instincts will tell you to go big or go home in order to give your plant ample room for growth, but be careful. Too much space in the pot will hinder drainage and leave soil too wet, drowning your plant.
Here is a step by step guide for getting it done:
1. Water: First things first, you need to lightly water your plant. This is mainly to aid the root ball in sliding out of the current pot, though it is generally a good rule of thumb to water your potted plants!
2. Remote the Plant: Rather than grabbing hold of the base of the plant stalks (you know who you are), turn the pot on its side. Carefully hold the plant by the main stem or at its strongest point and pull the pot from the plant, not the other way around. If the plant is particularly stubborn, try more water or seperate the soil from the perimeter of the pot with a knife or trowel.
3. Prune the Roots: Once the plant is free of its pot, check out the roots and soil. If the soil appears to be pretty rich, try not to shuffle it around too much. If it is moldy, on the other hand, give you plant a shake to throw some of that tired soil aside.
If the roots have begun to coil, you will want to spread them back apart. You can use your hands but run the risk of pulling the root from the plant is it gets stuck. Use a sharp knife to cut the coils free so they can spread separately. Cut any rotten or dead roots at their ends, just as you would with split-ended hair to promote new, rapid growth.
4. Clean Pot: Give your plant’s new home a good scrub before move in day. The residue left on the inside of the pot could contain disease causing microorganisms and insect larvae!
5. Soil: If you have stocked the pot with well draining soil then there is no need for gravel at the bottom. Place a mound of soil at the bottom as a platform for the plant’s root ball. The top of the root ball should still be a half inch below the rim of the pot. This way, the pot will not overflow when you water as the soil slowly absorbs the water that sits on the soil surface.
6. Position the Plant: Make sure your plant is centered and straight, then set it in the soil so that it is evenly covered on all sides. You may use extra potting soil to correct the posture of the plant.
7. Fill: Continue to fill and press layers of new potting soil. The density of the soil should be such that it is firm to the touch but not hardened ground. You do not want to be able to press all the way to the bottom of the pot.
8. Watering: Water your transplanted or refreshed potted plant until water runs out of the bottom of the pot. This is easily done by setting the plant up underneath a bathroom or kitchen sink and just letting it really soak.
9. Settled Soil: After the first good watering, you may notice the top soil further settling. This is normal. Simply add another layer.
10. Light Trim: Give the plant a light pruning of anything brown or dry so that new branching is encouraged.
Conclusion
While it is not rocket science, repotting your indoor plants can be a little tricker than you originally anticipated. Many a potted plant have died on the journey from one pot to another. After all, you are essentially transplanting, a traumatizing process all living things.
As long as you treat your repotting adventures with this in mind, you will be sure to keep your plants alive and thriving in bigger pots, cleaner pots, or in their usual pots with a fresh batch of soil. Be conscious of the type of plant you are hoping to repot so that you don’t end up feeding your African Violets cacti food and follow the outline above. Doing so will keep a tropical flavor in bloom throughout your house all winter long.
Most Read


Is Home Staging Worth the Investment?
Apr 06, 2021

Budget-Friendly Shoe Rack Ideas
Apr 06, 2021