- No Obligations
- Stop Paying Too Much For Your Contractor
- No Spam Calling
- Screened & ID Checked Contractors only!
Window Caulking Practical Tips: Indoor & Outdoor
0
 Window Caulking Practical Tips: Indoor & Outdoor
earlyexperts.net
If you are someone who dreads the arrival of the utility bill each month or quarter, then it’s probably about time you checked the energy efficiency of your home. An energy-efficient home can keep the temperature inside fairly constant, and eventually save you money on your utility bills. One of the ways to improve the energy efficiency of your home is to make sure the windows are properly caulked. Caulking seals air leaks, and keeps out moisture, and is part of the weatherproofing of a home against the elements.
Inspection & Preparation
After the harsh winter weather, it’s always a good idea to check the caulking on the windows of your home to see if they have been damaged. If the window frames are rotting, if they are made of wood, or damaged, they will probably not be making a good seal and allowing air and moisture in the home. Try and gauge how many windows need recaulking and how long it will take to do each one. Timing is important with caulking as the material can take up to 24 hours to properly cure.
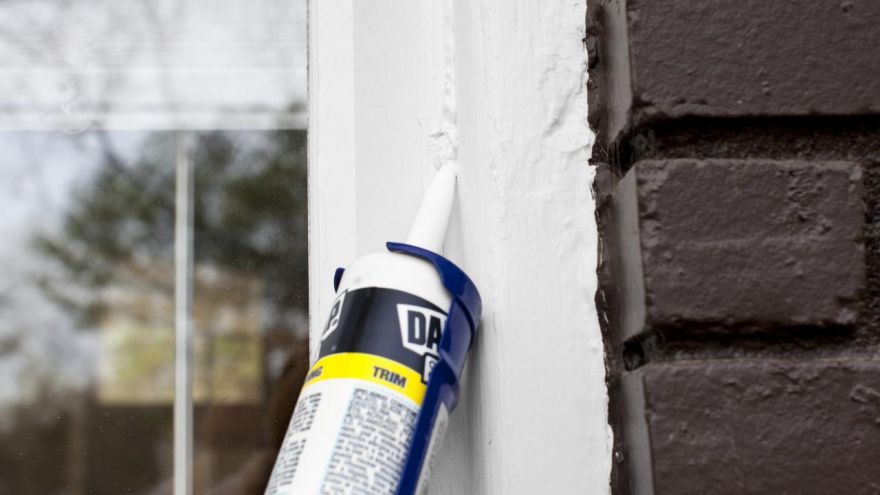
Before starting you’ll have to make sure you have a caulking gun. These cheap tools are designed to push the caulking compound out of a tube through an applicator nozzle and can be found at any home improvement store. Best to look for the gun with the longest tube poker, as not all guns are designed for all lengths of sealant tube. There are also a number of caulking compounds available on the market, and it is crucial to pick the right one for the job.
Acrylic Latex. This type of caulking does not respond to temperature changes and is not likely to flex or expand. One of its major drawbacks is that acrylic latex is not very durable in moist environments. It can be painted, however, it’s not recommended for sealing window frames.
Siliconized Latex. Not to be confused with Silicone caulking, Silicone latex has better adhesion than the acrylics. As it is resistant to moisture it can be used in bathrooms, and can also be painted over.
Silicone. This is one of the most durable caulking materials available. It has a wide number of applications, and is water resistant. However, the properties of silicone mean it does not necessarily seal well to wood, and can encourage metal corrosion. Silicone cannot be painted over, and once applied can be difficult to remove.
Polyurethane. These are considered the highest quality outdoor sealants. What makes polyurethane so universal is that it can seal surfaces of different materials, such as metal and wood, or wood and glass. These sealants are easy to work with, but the ultra-violet light in sunlight can break them down, so painting is recommended. Polyurethanes are also more expensive than other caulking compounds, so take into account the number of windows you might have to do.
Timing is everything when getting around to externally sealing windows. Caulking windows may be a simple job, but it can take time, and it also needs the weather to be on your side. If you are going to seal the exterior of the windows, the outside temperature needs to be at least 5F (7C), and preferably with low humidity. The caulking sealant can take a day to dry completely, so if the temperature varies wildly, or there’s a rainstorm, it could ruin all the work you have done.
Getting Down To Business
When you are ready to start work here some great tips on how to perfectly caulk a window.
✓ Be practical and start on a window that is easily accessible on the ground floor, and move up the house using ladders or scaffolding as required.
✓ Clean the window frame of old caulking. To get the best results you need two clean surfaces for the new sealant to attach to. A putty knife should get the most stubborn remnants out of the joint.
✓ If the wooden window frame has any rot, remove it and replace with a fillet of new.
✓ Use masking tape to control the line of sealant. Once the caulking is applied and smoothed, immediately remove the tape to leave a perfect edge.
✓ With the sealant tube in the gun cut the tip at a 45-degree angle about a ¼ inch (0.6cm) from the tip if you have enough room to use the gun. If not then cut the tip horizontally, which means you have more than one angle to approach the caulking, and can swivel it into difficult positions.
✓ Try and press the tip of the sealant gun into one corner of the window, and apply a continuous ribbon to the next corner. The bead should be thick enough to fill the gap. You should be pushing the caulking into the gap rather than dragging it over the top. This makes it more likely you will fill the gap rather than seal over it. Pushing the sealant into the gap increases the chances of it bonding to both surfaces.
✓ If you want the caulking to look professional, try and move the tip along the smoother surface you’re sealing. Riding the tip over a rough surface can exaggerate the bumps with the caulking not filling the gap correctly, and making the contour look uneven.
✓ If you have a long run that can’t be done in one, don’t start where you left off. If you do this, it can create a big unsightly glob of sealant. Go as far as you can, and then start from the other end and meet along the join. If you can meet somewhere not at eye level even better.
✓ Keep your wrists stiff when pumping the sealant gun. If you are caulking an extended length, try to use your upper body and legs to keep the angle correct between the gun and the gap. Don’t move your wrists.
Once you’ve laid a bead of sealant, it’s time for the ‘tooling’, in other words using something to smooth the surface and remove the excess. The curved end of a popsicle stick is a good option as it will give a nice rounded finish to the caulking. Other people swear by a finger wrapped in a rag, or just the finger on its own. However, you should be aware that some sealants can be harmful and it is best to check if it can be safely touched.
✓ The caulking should be allowed to dry for at least 24 hours. Not long after its application, the sealant will develop a skin, but it is still not completely cured.
✓ The sealant will be unstable until it has had enough time to dry out completely. This is where good weather is important, dampness or rain can seriously interfere with the curing process.
✓ Sealing the tip of the caulking gun, so the sealant doesn’t dry out and become blocked entirely is always a problem. A dried plug can be a devil to remove.
✓ A self-tapping screw is a good way to remove a plug of dried sealant. Or you can use the screw as a plug, and leave it in the tip if of the gun, and remove when you need to use the sealant again.
✓ Another way to seal a half-used tube of caulk is to force a large glob from the tube and fashion it into a ball the size of a peanut. Form the peanut glob into a cap for the tube tip with your finger. The cap will harden and leave the sealant inside soft.
✓ Sometimes sealant will dry down the whole length of the tip. In that case, you can use a sharp knife to split the plastic nozzle into two lengthwise. You can then remove the hardened caulk, and bind the two halves with duct tape to continue caulking.


